Showing posts with label chocolate. Show all posts

Sunday, March 6, 2011

Let Him Eat Cake

Every year for my husbands' birthday I of course make him a birthday cake.  My hubby's a little unusual in the fact that he doesn't want your traditional layer cake with fluffy frosting, no, he always wants a cheesecake.  Now I usually make him this chocolate espresso cheesecake that I found ages ago in Bon Appetite, but this year he shocked me and asked me to shake it up just a little and make a butterscotch cheesecake, because....well, he loves butterscotch (I up till this point did not know this, although his repeated requests for butterscotch fudge at Christmas should have clued me in). 


So dragging my sick self up from my quarantine and I attempted to whip up this cheesecake.  Stupidly I had the dumb idea to make homemade butterscotch instead of cheating and just buying some.  Fair warning, do not attempt to make candy when you are sick, it will not turn out well.  And do not use those piece of crap "non-reactive" plastic spatulas when making any sort of caramel, it totally f#$%s it up!  Nevertheless I continued on with my cheesecake plans, cursing my grotesque looking butterscotch, hoping for a miracle from the kitchen gods for success because lets be real, I was not going to do this f#$%ing thing all over again, I was barely hanging on to consciousness as it was!  So I diligently put everything together, ignoring the butterscotch hell sitting in the bowl on the counter, and I added it, with the hopes that it would magically incorporate smoothly into the filling and no one would be the wiser.  Well the gods must have been smiling on me that day, or hoping to get rid of me, because it did go in and I did have wonderfully velvety smooth cheesecake filling, that I baked, chilled, and waited on, hoping for butterscotch Nirvana.  Did this momentous thing happen?  Why yes, yes it did, and thankfully for my husband, it was delicious, as I could tell from how quickly he licked the mixing bowl.  So in the end he did eat cake......quite a lot I might add.  That's what birthday's are for......so we can all have the chance to dive fork first into cheesecake heaven.

Chocolate Butterscotch Cheesecake

Cook Time: 1 hour 30 minutes

1 package of chocolate wafer cookies
5 tablespoons unsalted butter melted and cooled
2 8oz packages of cream cheese at room temperature
2/3 cup sugar
3/4 cup sour cream at room temperature
3 eggs at room temperature
2 egg yolks at room temperature
1 tablespoon vanilla bean paste
1-1/2 cup butterscotch sauce
1/4 cup whipping cream
4oz dark chocolate chopped

Note: For homemade butterscotch I used the recipe from Simply Recipes here.

Preheat oven to 350 degrees.  In a food processor grind the cookies to a fine crumb.  While the processor is running drizzle in the butter until thoroughly incorporated.  Press the crumbs into a 9-inch springform pan, pressing the crust up about two inches on the sides.  Triple wrap the pan in foil, making sure the foil forms a good seal around the pan.  Set aside. 


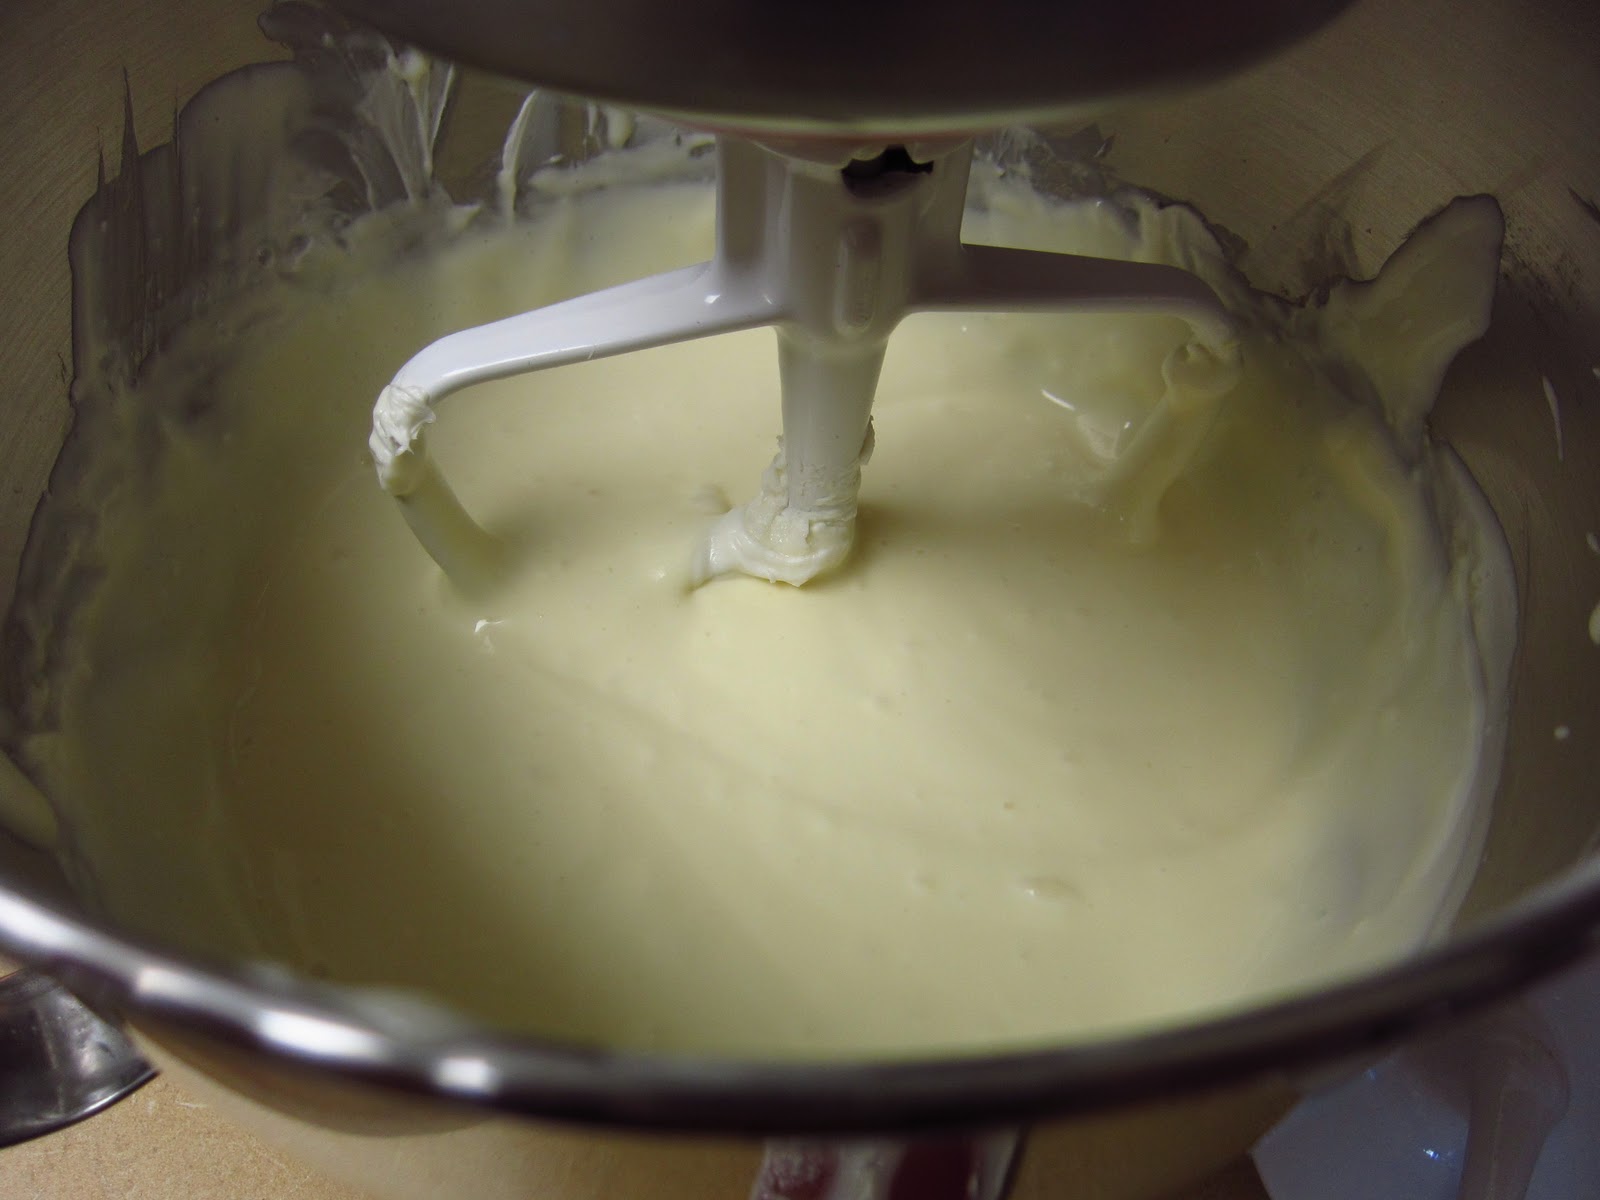
To prepare the filling, using a stand mixer with a paddle attachment, mix the sugar and the cream cheese until smooth, scraping the sides occasionally.  Add the sour cream and mix until thoroughly combined.  Add the eggs, one at a time, mixing well between each addition.  Scrape bowl and mix again.  Finally add the vanilla and butterscotch, mixing to completely combine.


Lastly in a small pot over medium low heat add the whipping cream and chopped chocolate.  Stir until the chocolate is completely melted and shiny.  Set aside.


Pour half the filling in the prepared crust.  Using half of the chocolate, drop spoonfuls evenly throughout the filling.  Drag a knife through the chocolate, swirling it with the filling.  Pour the remaining filling into the crust and repeat with the remaining half of the chocolate. 


Place the cake in a roasting pan and filling the roasting pan with hot water until it comes about 2 inches up the sides of the cake pan.  Place the roasting pan in the oven and bake the cheesecake until the middle has a slight jiggle to it but the edges look set, about 1 hour.  If the cake starts to brown to much on top just cover loosely with foil.  Remove the cake from the waterbath and place on a rack to cool.  Once cooled remove the foil and place in the refrigerator.  Chill the cheesecake a good 4 hours before serving, but it is best to chill it overnight.

Wednesday, February 2, 2011

Post In A Pinch

Yesterday I had a little bit of a panic attack when it dawned on me that I had not posted anything since Saturday.  Additionally I had nothing in my house to cook with, at least anything that wasn't frozen solid. 


So I hurried home after work and surveyed my kitchen for odds and ends that could become something more substantial, and wouldn't you know it I found some yummy Valrhona chocolate that I had wanted to use for another recipe that just didn't pan out. 
So chocolate it was, and now what to do with it.   It had to be something easy, because it was just me and the three year old for the evening.  More surveying was needed, and after going through every cupboard at a frenzied pace I figured out what to do........cookies. 


So I feverishly cleaned up the sugar I spilled all over the kitchen during my treasure hunt, threw everything back into its respective drawer or cabinet, ran to the store to pick up chocolate chips, picked up the little one from daycare, made her dinner, got her bathed, pretended that Dora the Explorer was the most fascinating thing ever, read the bedtime stories, brushed teeth, put her to bed, gave my husband a kiss when he got home, and at ten o'clock at night I made cookies, and thank god they were good, because I think I would have caused major harm to my innocent mixer had they not turned out.  As it turns out they were more than good, ending up to be like a brownie in a cookie, and the end result was simple, a post in a pinch.......and a chocolate craving satisfied.

Chewy Triple Chocolate Cookies

Cook Time: 45 minutes

2 cups all purpose flour
2/3 cup cocoa powder
1/4 teaspoon salt
1 cup unsalted butter at room temperature
1-1/2 cup packed brown sugar
1 tablespoon espresso powder
1 tablespoon water
2 eggs
1-1/2 teaspoon pure vanilla extract
3oz melted dark chocolate
12oz semi-sweet chocolate chips


Preheat oven to 350 degrees.  In a medium bowl sift together the flour, cocoa powder, and salt.  Set aside.  In a small bowl combine the espresso powder and water and stir until the powder is dissolved.


Using a stand mixer with a paddle attachment cream the butter.  Add the sugar and mix until combined.  Add the eggs, one at a time, mixing between each addition. 


Add the vanilla and espresso and mix well.  Add the chocolate and mix until well mixed, scraping the sides of the bowl.  Add the dry ingredients, mix until just combined, then add the chocolate chips.  Chill the dough for about 30 minutes before baking. 


Using a medium sized ice cream scoop, scoop the cookie dough into equal portions (about 2 tablespoons) on a silicone or parchment lined baking sheet.  Place in the middle of the oven and bake until the middle looks set but is still soft, about 10 minutes. 


Remove the cookies from the oven and allow the cookies to sit on the cookie sheet about 5 minutes.  Remove the cookies using a spatula and place on racks to cool completely.  Makes about 2 dozen cookies.

Tuesday, January 25, 2011

Daydreams Of Mexico

The other day I was reading a post by David Lebovitz about a recent trip he took to Mexico, and the yummy Arnold Palmer's he was having (in Mexico?) and it got me thinking, well obsessing, about how much I love Mexican food......and unfortunately how crappy the dreary view from my front window is. 


But while hallucinating about a skinny version of myself frolicking on white sand beaches in a bikini that I only could have worn when I was eight, I started to day dream about the flavors that I have experienced eating some of the more memorable Mexican meals in my day.  All I could think about was the heat, smokiness, and the freshness of Mexican cuisine. 


Then for some unexplained reason I looked down at my cup of tea and out of the blue shifted gears and thought, "a good piece of shortbread would be nice."  Sometimes I wonder how my brain even functions.  But this randomly placed thought, smack dab in the middle of my Mexican daydream, gave me the grand idea of how to fuse British and Mexican, killing two birds with one stone, satisfying my lust for shortbread with my longing for the flavors of Mexico.  Long story short (or short story short in this case), I ended up with chocolate, dulce de leche, cinnamon, vanilla, shortbread and chiles.  The perfect accompaniment to my tea as I watch the rain and think of Mexico.

Mexican Inspired Millionaire's Shortbread

Cooking Time: 45 minutes

2/3 cup unsalted butter at room temperature
1/3 cup sugar
1 teaspoon pure vanilla extract
1 cup flour
1 teaspoon cinnamon
1/4 teaspoon salt
16 oz dulce de leche
1-1/2 teaspoon vanilla bean paste
1 teaspoon unsalted butter
6oz chile infused dark chocolate

Note: I like to make dulce de leche at home, and David Lebovitz has some excellent instructions here to do it, but you can buy it commercially as well.

Preheat oven to 350 degrees.  Butter an 8x8 inch pan and set aside.  In a small bowl combine the flour, salt and cinnamon and set aside.  Using a stand mixer with a paddle attachment blend the butter and sugar together until well combined.  Add the vanilla and mix again. 


Add the dry ingredients and blend until the dough comes together.  Press the dough into the prepared pan and bake until pale in color and the edges are slightly golden, about 20-25 minutes.  When the shortbread is done remove from the oven and cool on a wire rack.


Once the shortbread is completely cool in a small bowl heat the dulce de leche in a microwave just until soft enough to spread, about 2 minutes.  Add the vanilla bean paste and then spread the caramel over the shortbread.  Allow the caramel to set at room temperature before you start on the chocolate.


When the caramel has hardened, melt the chocolate and the butter in a double boiler or in a bowl over simmering water.  Pour the chocolate over the caramel, spreading it evenly, and allow to set at room temperature.  When the chocolate has started to harden but is still a little soft, cut the shortbread into serving sized squares, then allow to completely set.

Tuesday, December 14, 2010

A Minty Little Truffle

A few posts back I tested the waters of truffle making and made pumpkin truffles, and my dear husband yet again served as my test subject.  Now he usually gives me a one or two word response (maximum of three) when it comes to my cooking, and it is usually something like this..."it's good," or "I like it." 

But when I made those truffles I got an actual suggestion, "ooh, you should do a peppermint truffle next."  Now since he actually exceeded his three word maximum I had to do it, and he even gave me suggestions on how to create these tasty little treats to boot....a budding chef in the making.......maybe I am rubbing off on him, scary.  Sometimes I really think I bite off more that I can chew because I was not in any way prepared for the horror that would come to me when making these stupid things.
Now you're probably asking yourself how could there be horror when chocolate is involved?  We'll there can be, and I can honestly tell you that chocolate seizing on you is horrific, especially when it is midnight and you are trying to finish these #$%!%&* truffles for a potluck the next day and you have had three bags (not one but three) of white chocolate seize on you.  You then find yourself running to the store in the middle of the night, make-up smeared, hair a mess, covered in chocolate, asking yourself in your car why the damn chocolate won't melt properly and telling yourself that if this last bag you are about to buy doesn't melt then you are just going to chuck it all and never lay your eyes on a truffle again!  I will warn you ahead of time that due to this set of unfortunate events I didn't take as many photographs as I should have, hard to work a camera when your sobbing over grainy white chocolate that refuses to melt.
Nonetheless I did get the last bag to melt.....well sort of.....and learned a little about melting white chocolate in the process.  So once again I used my husband's test subject skills and had him taste my minty little truffles and he said "they're good."  Success measured in two words or less.

Peppermint Truffles

Estimated Cook Time: 4 hours

8.5oz dark chocolate (I like Valrhona) chopped
1 cup heavy cream
2 teaspoons pure vanilla extract
1 teaspoon pure peppermint extract
2 tablespoons unsalted butter
(you can use peppermint oil as well, but use much less)
16oz white chocolate finely chopped
1/2 teaspoon peppermint extract
1/2 cup crushed peppermint candy

In a small sauce pan over medium heat bring the heavy cream to a simmer.  Add the vanilla and peppermint extract.  Place dark chocolate in a large glass bowl and pour the hot cream over.  Let stand for 2-3 minutes.  Stir the chocolate and cream mixture until smooth.  Stir in the butter until completely melted and incorporated into the chocolate and refrigerate until firm, about 2 hours. 

Once firm, using a small melon baller, scoop small portions of the truffle mixture out, using the palms of your hands if you have to to form nice balls of chocolate.  Once you have formed all your truffles place them back in the refrigerator for an hour until they are firm. 

For the white chocolate place the chocolate in a double boiler set over medium heat.  If you don't have a double boiler you can use a metal heat resistant bowl fitted over a saucepan with simmering water.  Add the peppermint extract before the chocolate is melted.  Do not allow the water to get too hot, this will burn the chocolate.  Actually the best way to heat the chocolate is to bring the water to a simmer and remove from the heat and melt the chocolate off the heat.  Also, don't use a wooden or plastic spoon to stir the chocolate, since both can contain moisture which can cause the chocolate to seize up (seizing is when water is introduced to the chocolate causing it to become more solid and grainy....not good).  Instead always use a metal spoon, especially when stirring white chocolate. 

Once the chocolate is melted remove from the heat and allow to cool.  Now you can go to the trouble to temper the chocolate but I just didn't have the energy to do it.  However, if you fancy tempering the chocolate, David Lebovitz does a great job explaining how to do it here.  Once the chocolate is cooled, using a fork, dip the dark chocolate balls in the melted white chocolate and place them on a foil lined tray.  Immediately after dipping sprinkle each truffle with the crushed peppermint candy.  Place the truffles back in the refrigerator and chill until set, about another hour.  Remove truffles from refrigerator about a half hour before serving.

Thursday, November 25, 2010

A Thanksgiving Treat

So I thought I would do a very quick post today and pass on a quick Thanksgiving treat.  So here it is, happy Thanksgiving to all my readers!

Pumpkin Truffles

8oz good dark chocolate chopped
(I prefer Valrhona, at least 71% cocoa)
1/4 cup pumpkin puree
(I used fresh pumpkin here and blended it until very smooth)
2 teaspoons vanilla
3/4 cup heavy cream
3 cinnamon sticks
4 tablespoons brown sugar
2 tablespoons butter
2 tablespoons dark rum (optional)
3 tablespoons granulated white sugar
1 tablespoon good cocoa powder
2 teaspoons pumpkin pie spice

In a small saucepan over medium heat, heat the cream, pumpkin puree, brown sugar, and cinnamon sticks until simmering, about 10 minutes.  Remove from heat, and let stand for 5 minutes.  Place chopped chocolate in a medium bowl.  Remove the cinnamon sticks from the cream mixture and add the vanilla and rum.  Pour the cream mixture over the chocolate and let sit for about 3 minutes.  Add the butter and whip the chocolate mixture until the chocolate is very smooth.  Place the ganache in the refrigerator and chill until firm, about 2 hours.  Mix together on a small plate the white sugar, cocoa, and pumpkin pie spice.  Remove the chilled ganache from the refrigerator and using a spoon scoop out about 2 tablespoon sized portions.  Roll each portion to form a ball then roll the truffle in the cocoa mixture.  Chill the truffles again until about 30 minutes before serving.  Serve truffles at room temperature.

Sunday, November 21, 2010

A Very Un-Pecan Pie

Let's get the record straight right from the start......I LOVE pecan pie, in fact I wait all year to have it.  Strangely though I think I am the only one in my family that has an affinity for this sweet treat. 
This unfortunate fact therefore pushed me to come up with an alternative to this dessert that still embodied the essence of pecan pie but without, well, pecans.   Now I know, I know, this pie is a staple at any Thanksgiving feast and why would anyone want to screw with perfection, but out of necessity I had to shake it up a bit, challenge the norm, push the boundaries (you get the drift) so my family could be one with dessert Nirvana.  So to satisfy my year long craving I took the notion of pecan pie and decided to give it, well, a tropical theme, and added some chocolate just for good measure (and to satisfy my husband who is worse than a woman when it comes to chocolate).  What I ended up with was something pretty outrageous, a little unusual, and hopefully a nutty pie that my family can love. 

Chocolate Macadamia Nut and Coconut Pie

1 9-inch pie crust
*you can refer to my post on pie for a recipe
4 eggs
1/2 cup brown sugar
1/4 cup white sugar
1 cup light corn syrup
3 tablespoons heavy cream
2 teaspoons vanilla
1/4 cup butter
8 oz semi-sweet chocolate
1 1/2 cups macadamia nut pieces toasted
2/3 cup unsweetened grated coconut

Preheat oven to 375 degrees.  In a small saucepan melt the butter and six ounces of the chocolate.  When the chocolate is completely melted set aside while you finish the filling.  In a large bowl combine the eggs, sugars, vanilla, corn syrup, and cream.  Mix until well combined.  Add the melted chocolate and mix until well incorporated. 

In a small bowl combine the macadamia nuts and coconut.  Pour into a prepared 9-inch pie crust.  Pour the chocolate mixture over the nuts (you'll notice that the nuts start to rise to the top, that's OK, it's what you want to see).  Cover the crust with foil (this prevents the crust from over browning, just take it off mid-way through the baking process) and bake the pie until the filling is set but is still a little loose, about 1 hour.  Set the pie on a rack to cool completely. 
Once the pie is cool, melt the remaining two ounces of chocolate and drizzle over the top of the pie and your ready to serve!

Saturday, October 23, 2010

Cookie Code.............Cracked

Here in the Pacific Northwest coffee is a big deal.  I think it is all the rain.......I know it is all the rain.  Quite frankly the only way you can maintain some sanity when you are in the midst of a spring where it has been raining constantly for three months straight is to chug as much coffee as you can.  There are times when I think it is literally liquid sunshine.  So it is an added bonus when not only is the coffee really good, but also when there is a sweet accompaniment to dunk in your hot cup of happiness.  There is a local coffee company who's coffee I go out of my way to obtain, and I can with all certainty dedicate my marriage to this coffee, for without Stumptown, I may not have my dear husband.  So as luck would have it (my bank account may not agree), a coffee shop carrying Stumptown coffee opened up within walking distance from my office.  So who would have guessed that the other day I happened to be at this very establishment with my lovely British co-worker (who also shares my deep affection for coffee), when we spotted them, these lovely dunking jewels that were just begging to become intimate friends with our Americanos.
So with tongues wagging we purchased these biscuits (or cookies as we like to call them here in the states) and tested them with our delicious coffee.  Needless to say, we were instantly hooked.   They were a delicious buttery, crispy shortbread dotted with yummy hazelnuts, with half the cookie dunked in good dark chocolate.  Now that we had found our new afternoon obsession, we made the trek to that coffee shop practically everyday for the next week, hoping to gobble up another delicious cookie, but to no avail the cookies eluded us.  By the end of the week I was in a panic, I had to have the damn things...........so I decided I would crack this cookie code and make them myself.
So I went home that night, and madly tried to recreate this mystery cookie, thinking back to the flavors, the texture, and at about nine o'clock that night I had it, my Frankenstein was complete, and well, in my opinion, it was spot on.  I think Mary Shelley would be proud.

Hazelnut Espresso Shortbread Cookies

2 cups unbleached all purpose flour
1 1/2 cups butter at room temperature
1/2 cup chopped hazelnuts
3/4 cup sugar
1 1/2 teaspoons vanilla
1 tablespoon espresso powder
1 tablespoon hot water
16 oz dark chocolate melted


Preheat oven to 350 degrees.  In a small bowl combine the espresso powder and hot water
and stir until the espresso powder is dissolved.  In a mixer with a paddle attachment mix the butter and sugar until smooth and well combined.  Add the vanilla and espresso and mix again until well combined.  Add the flour and mix until just combined, then add the hazelnuts and quickly mix.

Turn the dough out onto a floured surface and knead the dough a few times until it starts to crack a little.  Roll the dough out until it is about a 1/2 of an inch thick.  Cut the dough into rounds using a 3 inch round cookie cutter and place on a cookie sheet lined with parchment paper.  Bake cookies for 15-18 minutes,  or until cookies look slightly browned around the edges.  Remove cookies from oven and let them sit on cookie sheet for an additional 5 minutes.  Place cookies on rack and cool completely.  Repeat with remaining dough.  Melt chocolate in a double boiler and dip each cookie half way up in the chocolate.  Place on rack and leave until chocolate sets (unless you just can't control yourself).  Makes about 2 dozen.

I think these cookies are delicious without the chocolate too, so you could leave some of them naked!