Sunday, March 6, 2011

Let Him Eat Cake

Every year for my husbands' birthday I of course make him a birthday cake.  My hubby's a little unusual in the fact that he doesn't want your traditional layer cake with fluffy frosting, no, he always wants a cheesecake.  Now I usually make him this chocolate espresso cheesecake that I found ages ago in Bon Appetite, but this year he shocked me and asked me to shake it up just a little and make a butterscotch cheesecake, because....well, he loves butterscotch (I up till this point did not know this, although his repeated requests for butterscotch fudge at Christmas should have clued me in). 


So dragging my sick self up from my quarantine and I attempted to whip up this cheesecake.  Stupidly I had the dumb idea to make homemade butterscotch instead of cheating and just buying some.  Fair warning, do not attempt to make candy when you are sick, it will not turn out well.  And do not use those piece of crap "non-reactive" plastic spatulas when making any sort of caramel, it totally f#$%s it up!  Nevertheless I continued on with my cheesecake plans, cursing my grotesque looking butterscotch, hoping for a miracle from the kitchen gods for success because lets be real, I was not going to do this f#$%ing thing all over again, I was barely hanging on to consciousness as it was!  So I diligently put everything together, ignoring the butterscotch hell sitting in the bowl on the counter, and I added it, with the hopes that it would magically incorporate smoothly into the filling and no one would be the wiser.  Well the gods must have been smiling on me that day, or hoping to get rid of me, because it did go in and I did have wonderfully velvety smooth cheesecake filling, that I baked, chilled, and waited on, hoping for butterscotch Nirvana.  Did this momentous thing happen?  Why yes, yes it did, and thankfully for my husband, it was delicious, as I could tell from how quickly he licked the mixing bowl.  So in the end he did eat cake......quite a lot I might add.  That's what birthday's are for......so we can all have the chance to dive fork first into cheesecake heaven.

Chocolate Butterscotch Cheesecake

Cook Time: 1 hour 30 minutes

1 package of chocolate wafer cookies
5 tablespoons unsalted butter melted and cooled
2 8oz packages of cream cheese at room temperature
2/3 cup sugar
3/4 cup sour cream at room temperature
3 eggs at room temperature
2 egg yolks at room temperature
1 tablespoon vanilla bean paste
1-1/2 cup butterscotch sauce
1/4 cup whipping cream
4oz dark chocolate chopped

Note: For homemade butterscotch I used the recipe from Simply Recipes here.

Preheat oven to 350 degrees.  In a food processor grind the cookies to a fine crumb.  While the processor is running drizzle in the butter until thoroughly incorporated.  Press the crumbs into a 9-inch springform pan, pressing the crust up about two inches on the sides.  Triple wrap the pan in foil, making sure the foil forms a good seal around the pan.  Set aside. 


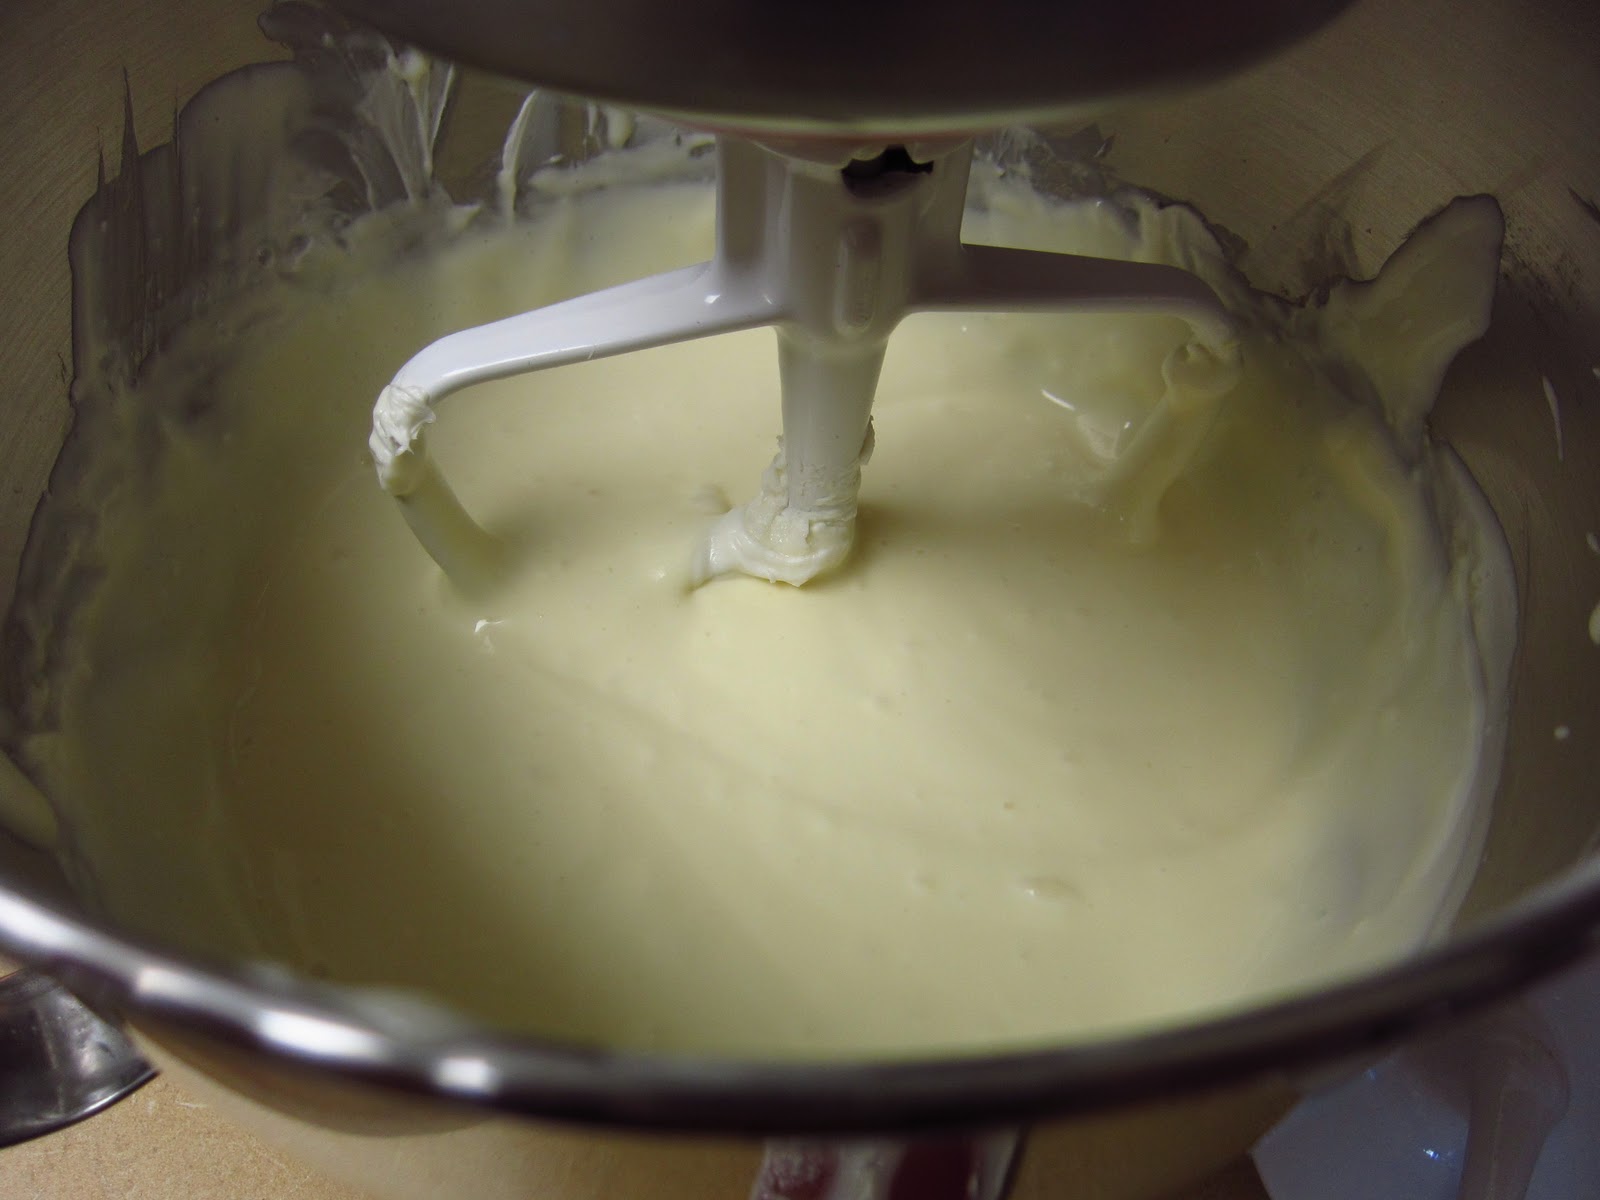
To prepare the filling, using a stand mixer with a paddle attachment, mix the sugar and the cream cheese until smooth, scraping the sides occasionally.  Add the sour cream and mix until thoroughly combined.  Add the eggs, one at a time, mixing well between each addition.  Scrape bowl and mix again.  Finally add the vanilla and butterscotch, mixing to completely combine.


Lastly in a small pot over medium low heat add the whipping cream and chopped chocolate.  Stir until the chocolate is completely melted and shiny.  Set aside.


Pour half the filling in the prepared crust.  Using half of the chocolate, drop spoonfuls evenly throughout the filling.  Drag a knife through the chocolate, swirling it with the filling.  Pour the remaining filling into the crust and repeat with the remaining half of the chocolate. 


Place the cake in a roasting pan and filling the roasting pan with hot water until it comes about 2 inches up the sides of the cake pan.  Place the roasting pan in the oven and bake the cheesecake until the middle has a slight jiggle to it but the edges look set, about 1 hour.  If the cake starts to brown to much on top just cover loosely with foil.  Remove the cake from the waterbath and place on a rack to cool.  Once cooled remove the foil and place in the refrigerator.  Chill the cheesecake a good 4 hours before serving, but it is best to chill it overnight.

Tuesday, February 22, 2011

Combating Virally Induced Laziness

So I know, I haven't posted anything in a week......anybody out there miss me?  My official excuse for this apparent laziness?  A really nasty cold, which has rendered me a useless pile of crap huddled either on my couch or hiding in bed trying desperately to escape the reality that I have not posted anything all week. 


But here I am trying to come out of my virally induced funk to write something in the hopes of keeping the few readers that I have. 
So what to post?  I honestly haven't cooked anything all week so a recipe at first seemed unlikely.  Luckily I had made something a couple of weeks ago, when I had an appetite, that was super yummy, and wouldn't you know it, I just so happened to be reserving it for just a situation like this.  It's a different twist on Chicken Parmesan, which of course is one of my all time favorites.  So here it is, my resurrection from near death, back into the blogging fold. 

Chicken Parmesan With Polenta

Cook Time: 2 hours

Sauce:2 medium onions diced
2 medium carrots grated
4 cloves of garlic minced
1/4 cup extra virgin olive oil
2 tablespoons butter
1 28oz can crushed tomatoes
1 28oz can diced tomatoes
2 tablespoons tomato paste
2 bay leaves
1 teaspoon sugar
2 teaspoons salt
1-1/2 teaspoons pepper
1/2 cup chopped fresh basil

Chicken:
8 thinly sliced chicken breasts
1-1/2 cups bread crumbs
1 cup freshly grated Parmesan cheese
1/2 teaspoon pepper
1/2 teaspoon salt
1 teaspoon dried basil
1/2 teaspoon dried oregano
3 eggs beaten
4 tablespoons extra virgin olive oil

Polenta:
5 cups cooked polenta (cook according to package directions)
1 tablespoon butter
1/4 cup cream

1lb fresh mozzarella sliced
1/2 cup freshly grated Parmesan cheese

Preheat oven to 350 degrees.  For the sauce, in a heat the olive oil and butter in a medium pot over medium heat.  Add the onions, garlic, and carrots.  Cook the vegetables until tender, about 10 minutes.  Make sure to sweat the vegetables and not brown them. 


Add the tomatoes and tomato paste.  Simmer until bubbling.  Add the remaining seasonings except the fresh basil.  Reduce heat to medium low and simmer the sauce uncovered for about 45 minutes.  Add the fresh basil and simmer for an additional 15 minutes.


While the sauce is simmering prepare the polenta.  Add the butter and cream to the cooked polenta.  Poor the polenta into a buttered 9-inch square baking dish.  Level off the polenta and chill until firm, about thirty minutes.  This can be done the day before.


To prepare the chicken, combine the bread crumbs, cheese, and seasonings in a medium bowl.  In a separate bowl whisk the eggs.  Preheat olive oil in a large skillet on medium high heat.  Dredge the chicken in the eggs then the bread crumb mixture.  Place breaded chicken in the skillet and brown on both sides.  Set chicken aside.


To assemble cut the polenta in eight equal squares.  Place in a buttered 10x13 inch casserole dish.  Place one piece of chicken on each piece of polenta. 


Top the chicken with a slice of mozzarella.  Pour the sauce over the chicken and sprinkle with the 1/2 cup Parmesan.  Bake until the cheese is melted and bubbling, about 35-45 minutes.

Sunday, February 13, 2011

For Valentine's Day

So tonight, on the eve of Valentine's day I thought I would just pass on a little treat, no commentary, just a little treat to hopefully trigger some lust out there.  Happy Valentine's day to all my readers!


Raspberry Creme Brulee Tart

Cook Time: 1 Hour

Crust:
1-1/2 cups all purpose flour
1 tablespoon sugar
1/4 teaspoon salt
1/2 cup cold unsalted butter
3-5 tablespoons ice water

Creme Brulee:
3 egg yolks
1 whole egg
2 cups heavy cream
1/3 cup sugar
3 teaspoons vanilla bean paste

1/4 cup raspberry preserves
4 tablespoons sugar
1 pint of fresh raspberries

Preheat oven to 350 degrees.  In a food processor pulse flour, sugar, and salt to blend.  Add butter and pulse until the butter is the size of peas.  Add three of the tablespoons of the water and pulse until the dough comes together.  Add more water if needed.  Press the dough into a 10 inch tart pan.  Refrigerate dough for 30 minutes. 


Remove the dough from the refrigerator and poke with a fork.  Place tart shell in the oven and bake until golden, about 30 minutes.  If the shell puffs up while cooking just pierce with a fork to deflate it.  While the crust is baking start making the custard by heating the cream and the vanilla bean paste until steamy.  While the cream is heating in a stand mixer with a paddle attachment beat the eggs and sugar until thickened and pale, scraping the bowl to ensure all the yolk is emulsified. 


Remove the cream from the heat and with the mixer running slowly add the cream, tempering the eggs.  When the crust is done baking remove from the oven.  While the crust is still hot spread the preserves all over the crust.  Strain the custard through a sieve into a bowl.  Slowly pour the custard over the preserves and bake at 325 degrees until the custard is slightly set but still has some wiggle to it. 


Remove from the oven, cool, then refrigerate until completely set, about an hour.  Turn the broiler on, placing the rack on the highest level.  Sprinkle the 4 tablespoons sugar over the top, and place tart under the broiler.  Broil just until the sugar caramelizes, about 2 minutes.  Remove the tart from the heat, allow the sugar to cool, then top the tart with fresh raspberries.

Wednesday, February 9, 2011

For The Love Of A Rotisserie Chicken

Since Valentine's day is upon us I think that a post about love is quite appropriate.  So this post is simply about my love for rotisserie chicken's.  My reason for loving them is quite simple.....they make my life easier, and anything that can make my life a little easier I immediately place in the love category. 


A rotisserie chicken makes my life easier by being delicious, affordable, and versatile......and of course when I am done with them I am able to add to my skeleton collection in my freezer so I can make chicken stock until my little heart's content (that sounds a little disturbing.....oh well).  So needless to say many rotisserie chickens have been used in my kitchen to make sandwiches, soups, casseroles, burritos, tacos....you get the point.  But this time I decided to use my tasty roasted chicken to stretch my wings and deviate from a very comfortable path, a lasagna path. 


Usually for me when I do lasagna I do a traditional red sauce lasagna, but this time I wanted to be a bit daring and mix it up a bit with a white sauce lasagna featuring my tender bird sitting in the fridge, waiting to be dismantled.  I also decided to incorporate lemon and yummy artichokes into my lasagna (boy I feel so saucy right now!).  I did however underestimate how much bechamel I would need for a lasagna, so that was a bit of a bummer, and while I did like it (my husband especially liked it), change for me is a bit difficult, and I missed my red sauce lasagna.  So if your feeling a bit daring, and love bechamel this baby is meant for you.  Change is good, except when red sauce is missing from the equation.

Artichoke And Chicken Lasagna

Cook Time: 1-1/2 Hours

1 rotisserie chicken, meat removed and chopped
16oz frozen artichoke hearts thawed and chopped
4 cloves garlic minced
zest from three lemons
3 tablespoons fresh lemon juice
5 tablespoons extra virgin olive oil
16oz whole milk ricotta cheese
2 eggs
3 cups shredded mozzarella cheese
2 cups pesto
8 cups whole milk
1/3 cup butter
1/2 cup flour
2 teaspoons kosher salt
1-1/2 teaspoons pepper
1 package no boil lasagna noodles
1/2 cup freshly grated Parmesan

Preheat oven to 375 degrees.  In a medium bowl combine the ricotta and the eggs.  Set aside.  In a large skillet heat the olive oil over medium heat.  Add the garlic and saute until tender, about three minutes.


Add the chicken and the artichokes and saute until heated, about 10 minutes.  Add a teaspoon of the salt, half a teaspoon of the pepper and half of the lemon zest.  Saute for an additional minute then remove from the heat.  Add the lemon juice, stir, and set aside. 


For the bechamel heat the milk over medium heat in a heavy pot until steaming but not boiling.  While the milk is heating melt the butter in another pot over medium heat.  Add the flour and whisk into the butter.  Let the roux cook for about 2 minutes. 


Slowly pour in the milk, whisking constantly.  Whisk the milk until thickened, about 8 minutes (it should coat the back of a spoon).  Remove from heat and stir in the remaining salt, pepper, and lemon zest. 


To assemble the lasagna butter a 9x13 in glass dish.  Ladle a layer of bechamel on the bottom (about 2 cups).  Next add a layer of noodles, then spread half of the ricotta mixture on the noodles.  Add a layer of pesto on top of the ricotta followed with a cup of the mozzarella and then 2 cups of the bechamel.  Next add another layer of noodles, then chicken, then mozzarella, then bechemel.  Continue with the layers until you have used all the ricotta and the chicken. 


Finish with a layer of noodles and top off with the last of the bechamel.  Sprinkle Parmesan on top and place in the oven and bake for about 45 minutes or until the lasagna is browned and bubbling.  Remove the lasagna from the oven and allow to sit for about 10 minutes before slicing.


Sunday, February 6, 2011

It's A Tortilla! Well Sort Of.......

I recently found myself on a quest to incorporate some Spanish cuisine into my cooking repertoire.  I had first wanted to conquer Paella but until I find the funds to purchase this Paella pan at Williams-Sonoma that dream will have to remain on hold.  So I backtracked a bit and decided to start with something simple....dipping my toes ever so gently into Spanish food waters. 


The first idea that came to mind was a Spanish tortilla.  Now here in the states when one thinks of a tortilla it usually involves either corn or flour and is vehicle for salsa or some type of yummy taco fillings.  But a Spanish tortilla is none of the above, and after making this one I would say that it is probably a close cousin to the frittata (what came first, the tortilla or the frittata?).  Now traditional Spanish tortillas are basically just potato, onions, and eggs, and are impressive in their sheer girth, but with some limitations on the sizes on pans that I had in my arsenal I knew that mine would not be as impressive. 


But I decided to go ahead with it, because it may not be that authentic but I had a feeling that it would still be good.  I also decided to play with the filling a bit, because I had found some beautiful Swiss chard at the market and some yummy chorizo that I just couldn't make an executive decision on what to do with, that is until now.


The one amusing this about this whole process was the flipping, since unlike a frittata which you finish cooking under a broiler, a Spanish tortilla is flipped in order to cook the eggs through.  So flipping this massive thing with limited equipment involved a small heated discussion with my husband and then a joint decision to use a cookie sheet in the flipping process, which in the end turned out well.  So after I mastered flipping, with some Julia Child-esque repairs to it, we dug in, serving it with a some nice toasted bread.  Unfortunately it was good enough to convince me that I need yet another pan, so the thickness is spot on.......damn you Williams-Sonoma.

Spanish Tortilla With Chorizo and Swiss Chard

Cook Time: 25 minutes

10 eggs beaten
1/2lb chorizo crumbled
1 large bunch of Swiss chard chopped
1 medium yellow onion sliced
1/3 cup olive oil
3lbs red potatoes peeled and thinly sliced (a mandolin works well for this)
1 teaspoon kosher salt
1/2 pepper


In a large (14-inch) non-stick skillet heat olive oil over medium high heat.  Add the potatoes and season with half the salt and pepper.  Turn the potatoes frequently to prevent browning (for a Spanish tortilla you want the potatoes cooked but not too crispy on the exterior). 


Once the potatoes are done place on a paper towel lined plate to soak up the excess oil.  Discard any excess oil in the pan and add the sausage to the pan.  Cook until the sausage is almost cooked through then add the onion, and cook until the sausage is cooked through and the onion is soft, about 5 minutes.  Add the chard and cook until wilted, about 4 minutes, then season with the remaining salt and pepper. 


Return the potatoes to the pan and poor the eggs over the sausage mixture.  Reduce the heat to medium, and cook until the bottom is set and the eggs start to bubble a bit, about 5 minutes.  Using a large plate or cookie sheet invert the pan, placing the tortilla onto the plate. 


Then push the tortilla back into the pan, cooked side up and cook until the eggs are completely cooked, about another 5 minutes.  When the tortilla is cooked through remove from the heat and allow the tortilla to sit in the pan for about 10 minutes.  After the tortilla has cooled slide it onto a serving plate and slice.

Wednesday, February 2, 2011

Post In A Pinch

Yesterday I had a little bit of a panic attack when it dawned on me that I had not posted anything since Saturday.  Additionally I had nothing in my house to cook with, at least anything that wasn't frozen solid. 


So I hurried home after work and surveyed my kitchen for odds and ends that could become something more substantial, and wouldn't you know it I found some yummy Valrhona chocolate that I had wanted to use for another recipe that just didn't pan out. 
So chocolate it was, and now what to do with it.   It had to be something easy, because it was just me and the three year old for the evening.  More surveying was needed, and after going through every cupboard at a frenzied pace I figured out what to do........cookies. 


So I feverishly cleaned up the sugar I spilled all over the kitchen during my treasure hunt, threw everything back into its respective drawer or cabinet, ran to the store to pick up chocolate chips, picked up the little one from daycare, made her dinner, got her bathed, pretended that Dora the Explorer was the most fascinating thing ever, read the bedtime stories, brushed teeth, put her to bed, gave my husband a kiss when he got home, and at ten o'clock at night I made cookies, and thank god they were good, because I think I would have caused major harm to my innocent mixer had they not turned out.  As it turns out they were more than good, ending up to be like a brownie in a cookie, and the end result was simple, a post in a pinch.......and a chocolate craving satisfied.

Chewy Triple Chocolate Cookies

Cook Time: 45 minutes

2 cups all purpose flour
2/3 cup cocoa powder
1/4 teaspoon salt
1 cup unsalted butter at room temperature
1-1/2 cup packed brown sugar
1 tablespoon espresso powder
1 tablespoon water
2 eggs
1-1/2 teaspoon pure vanilla extract
3oz melted dark chocolate
12oz semi-sweet chocolate chips


Preheat oven to 350 degrees.  In a medium bowl sift together the flour, cocoa powder, and salt.  Set aside.  In a small bowl combine the espresso powder and water and stir until the powder is dissolved.


Using a stand mixer with a paddle attachment cream the butter.  Add the sugar and mix until combined.  Add the eggs, one at a time, mixing between each addition. 


Add the vanilla and espresso and mix well.  Add the chocolate and mix until well mixed, scraping the sides of the bowl.  Add the dry ingredients, mix until just combined, then add the chocolate chips.  Chill the dough for about 30 minutes before baking. 


Using a medium sized ice cream scoop, scoop the cookie dough into equal portions (about 2 tablespoons) on a silicone or parchment lined baking sheet.  Place in the middle of the oven and bake until the middle looks set but is still soft, about 10 minutes. 


Remove the cookies from the oven and allow the cookies to sit on the cookie sheet about 5 minutes.  Remove the cookies using a spatula and place on racks to cool completely.  Makes about 2 dozen cookies.

Saturday, January 29, 2011

Pasta For Men.....And Three Year Olds

Sometimes when I am cooking and writing about ANOTHER pasta dish I feel like I am being a little repetitive.  But in my household pasta is a staple, our culinary life blood if you will.  There literally isn't a week where we don't have pasta, in some form, and maybe it is sad to say, but I honestly would be lost without it.  So here I am, writing about yet another pasta dish, letting you know ahead of time that there will be more pasta on this blog, and hoping that the few readers I have won't stand up and leave me. 


For this dish I wanted to have something very hearty, something that feels like it just sticks to your bones, which in the winter is exactly what I crave.  In the pasta world I think that there is one sauce that does just that, ragu.  Ragu's are always heavy on the meat (which is why I think men love them) and require a fair bit of cooking time.  Now I know that I have done a ragu on the blog before, but I wanted to offer a little less time consuming one for those short weekday nights.  Also, the great thing about ragu's is they get better with time, so the sauce can be made the night before and then reheated for pasta time the next day.  The beauty about a ragu is that you can also use any variety of meats, I have used lamb, and even chicken as a meat base for my ragu's. 


For this one I decided to use ground beef, pork sausage, and a little prosciutto, because the beef gives that richness in flavor, the sausage adds a bit of peppery kick, and the prosciutto adds a bit of a savory flavor, and fortunately all of them don't need hours of cooking time like larger tougher cuts of meat.  The pasta choice for this dish was pappardelle, the fatter cousin of fettuccine, which I think holds up well to a rich meaty ragu.  A ragu also traditionally uses a sofritto as a base, which is a mixture of onions, celery, and carrots.  But for this ragu I decided to just go heavy on the onions and garlic, and add a little bit of sugar to cut the acidity of the tomatoes, which is usually one of purposes that I think a sofritto serves as in a ragu. 
I also went with the addition of some sun dried tomatoes, which also added a wonderful rich tomato flavor, and a variety herbs to bump up the complexity a bit.


So I ragued away, and plopped this enormous bowl of pasta covered in meaty deliciousness in front of my husband, who with some affection says "why do you cook for any army?"  But judging by how quickly my picky little three year old blew through a bowl of this pasta on her very own (she's definitely Italian), I would say that I was glad I cooked for any army, and for three year olds.

Pappardelle With Ragu

Cook Time: 1 hour

1lb lean ground beef
1/2lb pork sausage
8oz prosciutto chopped
5 tablespoons olive oil
1 large yellow onion chopped
8oz Crimini mushrooms sliced
3 cloves garlic minced
28oz crush tomatoes
1/4 cup red wine
1/4 cup tomato paste
1-1/2 teaspoon sugar
1 teaspoon salt
1/2 teaspoon pepper
1 large bay leaf
1 teaspoon red pepper flakes
1/4 cup chopped sun dried tomatoes packed in oil
2 tablespoons chopped fresh rosemary
3 tablespoons chopped fresh Italian parsley
1/4 cup chopped fresh basil
1/2 cup Mascarpone
1/2 cup freshly grated Parmesan
2lbs Pappardelle


Preheat the olive oil in a large skillet over medium high heat.  Add the prosciutto and cook until starting to brown, about 3 minutes. 


Add the onions, mushrooms and garlic and cook until tender, about 5 minutes.  Add the ground beef and sausage and cook until no longer pink, about 8 minutes. 


Add the crushed tomatoes, tomato paste, and wine.  Reduce heat to medium low and bring to a simmer.  Once the sauce is at a simmer add the sun dried tomatoes, the bay leaf, sugar, salt and pepper, and red pepper flakes.  Cover and simmer the sauce over medium low heat for about 30 minutes to allow the flavors to combine. 


After the 30 minutes add the remaining fresh herbs, and the Mascarpone.  Simmer uncovered for another 15 minutes.  Meanwhile heat a large pot of boiling water over medium high heat.  Salt the water and add the pasta. 


Cook the pasta until al dente, about 8 minutes if using dried pasta, if using fresh reduce the cooking time to three minutes. 


Drain the pasta, reserving about 1 cup of the pasta water.  Toss the cooked pasta with the ragu, using some of the pasta water to loosen the sauce and to thoroughly coat the pasta.  Sprinkle the tossed pasta with the Parmesan and you're done!  Buon appetito!