Sunday, November 28, 2010

Fuel For A Marathon

So I know that the title of this post may be a little deceiving.  In no way am I going to run a marathon, nor have I EVER run a marathon.  In fact I really do think that my exercise-less self would probably pass out about a minute into one of those things (this is not something to be proud of). 

It's not that I hate to exercise (actually yes, yes I do hate it, but don't tell) it's that I just can't bring myself to sweat with thousands of other people.  I really do prefer to sweat all by myself.....I am getting way off subject here.  The title for this post actually comes from the fact that I actually think of the holiday season as a kind of marathon.  It is a marathon of shopping, eating, more shopping, lots of family, maybe a little drama, a lot of stress, and oh...yeah...eating.  So after Thanksgiving and pre-emptively before the start of the endless array of holiday parties and Christmas sweets, I like to treat myself to more of a slimming meal, a bit of a gastronomic break in what has to be the highest calorie ingesting time of the year. 
When I was thinking about what I would do for this healthy feast the first thing that came to mind was salmon.  But unfortunately when I mentioned this to my dear husband he promptly informed me he was not a fan.  So needless to say this made me want to make it even more, to prove to him that salmon is...well...of course...a delicious treat.  It was official,  I had decided what I my secret ingredient was for this iron chef challenge (I love to dramatize things) and now I had to decide how to prepare it.  This was actually the easy part, since I knew I had to do my dad's brown sugar salmon.  My dad has been making this salmon since we were kids, and since the holiday season is all about family it seemed fitting to use it to test my husbands disdain for salmon.  So I bought, I grilled in thirty degree weather, I converted a salmon hater and as a bonus, got a small taste of my childhood.  Now I feel ready for the gut busting calorie marathon to begin.

Brown Sugar Salmon With
Grilled Baby Bok Choy

Salmon:
1lb Salmon fillet
3 tablespoons brown sugar
1/4 cup thinly sliced sweet onion
1 lemon sliced
1 teaspoon kosher salt
1/2 teaspoon pepper

Bok Choy:
3-4 baby bok choy heads
1/4 cup olive oil
1/4 cup rice vinegar
3 tablespoons low sodium soy sauce
2 tablespoons chili sauce (Mae Ploy)
1 garlic clove minced
salt and pepper

Place salmon in a disposable aluminum tray (you can make one out of heavy duty aluminum foil).  Place the sliced onion on the salmon then sprinkle with the salt and pepper.  Sprinkle the brown sugar on the salmon followed by the sliced lemons.  Place the fish on a preheated barbecue or grill pan and grill until the fish is cooked through, about 15 minutes.  When the fish is finished using a large spatula remove the fillet from the tray, leaving the skin behind. 
For the bok choy, split the heads down the middle and cut out the tough center.  In a small bowl combine the oil, vinegar, soy sauce, chili sauce and garlic and whisk until combined. 
Drizzle half of the dressing over the bok choy and toss to coat, without breaking up the heads.  Season with a little salt and pepper and grill the bok choy until slightly tender, about 10 minutes, or 5 minutes per side.  Remove the bok choy from the grill and drizzle the remaining dressing over it.

Thursday, November 25, 2010

A Thanksgiving Treat

So I thought I would do a very quick post today and pass on a quick Thanksgiving treat.  So here it is, happy Thanksgiving to all my readers!

Pumpkin Truffles

8oz good dark chocolate chopped
(I prefer Valrhona, at least 71% cocoa)
1/4 cup pumpkin puree
(I used fresh pumpkin here and blended it until very smooth)
2 teaspoons vanilla
3/4 cup heavy cream
3 cinnamon sticks
4 tablespoons brown sugar
2 tablespoons butter
2 tablespoons dark rum (optional)
3 tablespoons granulated white sugar
1 tablespoon good cocoa powder
2 teaspoons pumpkin pie spice

In a small saucepan over medium heat, heat the cream, pumpkin puree, brown sugar, and cinnamon sticks until simmering, about 10 minutes.  Remove from heat, and let stand for 5 minutes.  Place chopped chocolate in a medium bowl.  Remove the cinnamon sticks from the cream mixture and add the vanilla and rum.  Pour the cream mixture over the chocolate and let sit for about 3 minutes.  Add the butter and whip the chocolate mixture until the chocolate is very smooth.  Place the ganache in the refrigerator and chill until firm, about 2 hours.  Mix together on a small plate the white sugar, cocoa, and pumpkin pie spice.  Remove the chilled ganache from the refrigerator and using a spoon scoop out about 2 tablespoon sized portions.  Roll each portion to form a ball then roll the truffle in the cocoa mixture.  Chill the truffles again until about 30 minutes before serving.  Serve truffles at room temperature.

Sunday, November 21, 2010

A Very Un-Pecan Pie

Let's get the record straight right from the start......I LOVE pecan pie, in fact I wait all year to have it.  Strangely though I think I am the only one in my family that has an affinity for this sweet treat. 
This unfortunate fact therefore pushed me to come up with an alternative to this dessert that still embodied the essence of pecan pie but without, well, pecans.   Now I know, I know, this pie is a staple at any Thanksgiving feast and why would anyone want to screw with perfection, but out of necessity I had to shake it up a bit, challenge the norm, push the boundaries (you get the drift) so my family could be one with dessert Nirvana.  So to satisfy my year long craving I took the notion of pecan pie and decided to give it, well, a tropical theme, and added some chocolate just for good measure (and to satisfy my husband who is worse than a woman when it comes to chocolate).  What I ended up with was something pretty outrageous, a little unusual, and hopefully a nutty pie that my family can love. 

Chocolate Macadamia Nut and Coconut Pie

1 9-inch pie crust
*you can refer to my post on pie for a recipe
4 eggs
1/2 cup brown sugar
1/4 cup white sugar
1 cup light corn syrup
3 tablespoons heavy cream
2 teaspoons vanilla
1/4 cup butter
8 oz semi-sweet chocolate
1 1/2 cups macadamia nut pieces toasted
2/3 cup unsweetened grated coconut

Preheat oven to 375 degrees.  In a small saucepan melt the butter and six ounces of the chocolate.  When the chocolate is completely melted set aside while you finish the filling.  In a large bowl combine the eggs, sugars, vanilla, corn syrup, and cream.  Mix until well combined.  Add the melted chocolate and mix until well incorporated. 

In a small bowl combine the macadamia nuts and coconut.  Pour into a prepared 9-inch pie crust.  Pour the chocolate mixture over the nuts (you'll notice that the nuts start to rise to the top, that's OK, it's what you want to see).  Cover the crust with foil (this prevents the crust from over browning, just take it off mid-way through the baking process) and bake the pie until the filling is set but is still a little loose, about 1 hour.  Set the pie on a rack to cool completely. 
Once the pie is cool, melt the remaining two ounces of chocolate and drizzle over the top of the pie and your ready to serve!

Saturday, November 20, 2010

Memories of Leavenworth

Recently I found myself reminiscing about a trip that we took this summer to Leavenworth, a little town here in the Pacific Northwest which has strangely taken on a Bavarian theme since 1962.  Everything from the architecture, the festivals, and especially the food there has taken on a German theme. 
When you are driving into town it really does look like some of those photos you seen of Bavaria and you suddenly feel transported to another place, without the hassle of airport security, crappy airline food, and just....well...the inconveniences of flying.  So looking back on that trip I fondly remembered the bratwurst that we had when we visited, (along with the amazing beer, but that's another story) and I felt a sudden urge to create a recipe at home to bring those flavors we experienced back to life.  So in preparing this recipe I wanted to make some attempt at paying a homage to fall, since I have a premonition that fall is leaving and taking her goodies with her (the forecast for snow here kinda helps with this notion).
Unfortunately on the night I had scheduled myself to make this dish I was not on my best behavior, in fact, I was being a bit of a s$%^ (shocker).  I distinctly remember having a small temper tantrum in the kitchen as I was putting this dish together saying out loud to myself how crappy my blog was, how no one was reading it anyway, and how this stupid !#$%*&#* recipe sucked and I just wanted to chuck it all.  After some very strange looks from my husband, who I think was convinced I was losing my mind, I calmed myself down, guzzled a glass of wine and ate what I had convinced myself to be a lousy dinner.  Needless to say, it was surprisingly not crappy, actually it was pretty damn good, and I found myself all of a sudden feeling much better about my universe (although the guzzling of a second glass of wine may have been the cause of such elation).  But most importantly this dish DID bring me back to this past summer, and brought back all the memories of a great trip spent with the people I love, and for that this recipe is precious to me.

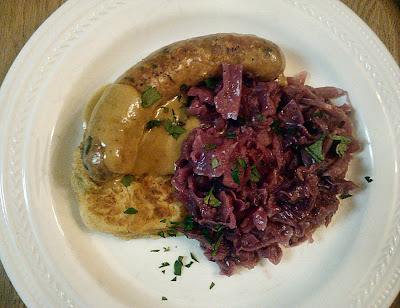
Braised Red Cabbage And Apples With
Bratwurst and Sweet Potato Cakes


Braised Cabbage:

1 small head of red cabbage thinly sliced
1 small sweet onion sliced
2 apples peeled and diced
3 tablespoons butter
3 cups apple cider
2 cups chicken broth
1 tablespoon fennel seeds
1/2 teaspoon cinnamon
1/2 cup apple cider vinegar
4 tablespoons brown sugar
2 teaspoons salt
1 teaspoon pepper
1 tablespoon fresh thyme chopped

Sweet Potato Cakes

2 medium sweet potatoes peeled and quartered
1 sweet onion diced
2 tablespoons butter
2/3 cup panko (Japanese breadcrumbs)
1/2 cup flour
1 egg
1 teaspoon salt
1/2 teaspoon pepper
1 tablespoon fresh Italian parsley finely chopped
3-4 tablespoons extra virgin olive oil

Bratwurst

6 fresh bratwurst
2 tablespoons olive oil
1 shallot diced
2 cups low sodium chicken broth
1 cup white wine
1 tablespoon Dijon mustard
1/2 teaspoon pepper

For the braised cabbage: Heat the butter in a large stockpot over medium heat until melted.  Add the apples and onions and cook until softened, about 5 minutes.  Add the cabbage and remaining ingredients.  Cover and cook until the cabbage is tender, about 25 minutes.  Uncover and cook an additional 20 minutes or until the liquid is reduced. 
For the bratwurst: In a large pan heat the olive oil over medium high heat.  Add the sausages and brown on both sides.  Remove sausages from pan and set aside.  To the pan add the shallot and cook until tender, about 3 minutes.  Add the broth, wine and mustard and cook until reduced and slightly thickened, about 10 minutes.  Add the sausages and cook until the sausages are heated through.

For the sweet potato cakes: Boil the sweet potatoes until very soft, about 25 minutes.  Drain and set aside.  In a small pan melt the butter over medium heat.  Add the onion and cook until tender and translucent, about 10 minutes.  Using a food processor process the sweet potatoes until relatively smooth.  Put the sweet potato puree in a small bowl and add the cooked onions.  Allow to cool.  Once cool add the egg, panko, flour and remaining ingredients.  Stir until well combined.  Using well floured hands mold the potato mixture into small patties.  In a medium pan heat the olive oil and cook the cakes until browned on both sides and heated through, about 4 minutes per side. 

Serve the sausages with the cabbage and potato cakes and drizzle with the sauce.

Tuesday, November 16, 2010

Pear Liberation

So like my previous post not only have I been surrounded by squash lately but I have also been surrounded by pears.  Now I didn't have nightmares about pears, but I have to say that I may be peared out...well at least for a little while anyway. 
In fact, quite possibly actually, if I see another bruised unhappy looking pear in my lunch I think I will throw it at someone, and believe me, I have a list of candidates.  So to avoid pear violence I had to find a way to use lots of pears and quickly...and pear butter came to mind.  Having said that, it turns out that lots of pears turn into lots of pear butter....so now instead of being surrounded by pears I am surrounded by pear butter.  In fact the giant bowl of it would just stare at me every time I opened my refrigerator because, well, I was too damn lazy to properly jar it.  Now I am in complete desperation to liberate myself from pear purgatory.  The first step in my liberation was to freeze a large quantity of this stuff, with the hopes that I would forget about it....but it was too yummy, so I had to salvage a small amount, to give me my last dose of pear butter for....at least a week or so anyway (and to provide my husband another companion for his peanut butter).  Needless to say, the purpose of this post is not only to give you a recipe for yummy pear butter but also to give you a yummy recipe that utilizes this little treat.  Isn't liberation is great!  Especially when it comes in the form of butter.

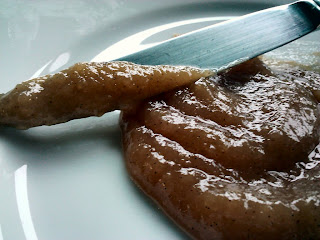
Pear Butter

4-6lbs of very ripe Bartlett pears
peeled, cored, and sliced
1/3 cup water
1 vanilla bean split and the seeds scraped
1 cup granulated sugar
1/2 cup firmly packed brown sugar
2 teaspoons cinnamon
1 teaspoon cardamom
2 teaspoons pure vanilla extract

In a medium sauce add the pears, water and vanilla bean with the scraped seeds.  Cover and cook over medium heat until the pears are very soft, about 45 minutes. 

Once the pears are soft remove the vanilla bean and pour the pears into a food processor and process until smooth.  Return the pear puree to the pan and add the sugar, spices, and vanilla extract.  Cook the puree, stirring frequently to prevent scorching, until the puree is reduced and very thick, about another 30 minutes. 
Note: The great thing about pear butter is that you can vary the spices quite a bit.  Star anise is very good, so is a little orange zest.  I am not a fan of nutmeg, but for those of you out there who love it, it would be good as well. 


Brie And Pear Butter Panini With
Arugula and Caramelized Onions

2 slices ciabatta bread
2 tablespoons pear butter
1 tablespoon butter
pinch of salt
1/2 yellow onion sliced
2-3 slices of brie (about 2oz)
3-4 arugula leaves
olive oil or extra butter for toasting the bread


Melt the butter in a small fry pan over medium heat.  Add the sliced onion and the pinch of salt.  Cook the onions until they are nicely caramelized, about 10 minutes.  While the onions are cooking preheat your panini pan over medium heat and assemble the rest of the sandwich. 

To assemble the sandwich, spread 1 tablespoon of the pear butter on each slice of bread.  On one slice place the Arugula over the butter and on the other slice place the brie over the butter.  Add the onions to one slice of the bread, put the two slices together and spread both sides of the sandwich with either olive oil or butter.  Place the sandwich in the panini pan and toast until the cheese is melted and the Arugula is wilted, about 4 minutes on each side.


Sunday, November 14, 2010

When You're Surrounded By Squash

The other day I found myself looking around my kitchen and realized one thing, that I was surrounded by squash.  I was actually a little impressed with the varieties of squash and pumpkins I had collected not only from my garden but from the various farmers markets, harvest festivals, and produce stands that I had been visiting over the course of the last month. 
However, I went to bed that evening and had a very strange dream about killer squash and how I was their most hated enemy since I kept many of their friends as captives on my back porch.  When I woke up that morning I was convinced that I was losing my mind and that I needed to find a way to thin out the inmates in my squash jail.  So I put on my thinking cap and tried to come up with a recipe that would liberate me from squash madness and therefore restore my sanity.  I spent several days researching, thinking, and obsessing about squash, but to no avail......no recipe.  As days passed I kept looking out at my squash prisoners on my back porch and wondered if I officially had recipe block (I don't know if that is a real term....I guess it is now).  Then the other night I was stirring some macaroni and cheese for my little one when it came to me, why not use it with pasta (being of Italian descent you would think this idea would have come sooner)?  So with a slightly disturbing smile on my face I scribbled a recipe on one of the hundreds of paper scraps I have littered throughout my house and once again a recipe was born, and luckily I liberated myself from squash......well at least some of it anyway.

Penne With Roasted Squash

4 large parsnips peeled and diced
6 cups of diced squash (butternut, golden nugget, delicata)
4 tablespoons olive oil
1/2 teaspoon pepper
1 teaspoon salt
1/2 pound bacon diced
2 medium shallots diced
2 garlic cloves minced
1 tablespoon butter
1/4 cup heavy cream
2 tablespoons fresh oregano chopped
1/4 cup fresh chopped Italian parsley
1 lb penne pasta
1/2 cup freshly grated Parmesan cheese
8oz Mascarpone cheese

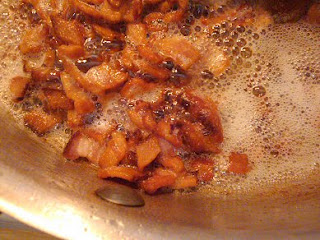
Preheat oven to 425 degrees.  I a large bowl combine the parsnips and squash.  Drizzle the olive oil over the veggies and sprinkle with the salt and pepper.  Stir the veggies well to evenly distribute the oil and spices.  Pour the veggies onto a baking sheet and roast until the veggies and tender and caramelized, about 35-45 minutes.  In a medium saucepan cook the diced bacon until crispy, about 10 minutes.  Remove the bacon with a slotted spoon and set aside. 

Pour off the excess bacon fat and add the butter, shallots, and garlic.  Cook the shallots and garlic until tender, about 3 minutes.  Add the cream, scraping up all the brown bits.  Meanwhile heat a pot of salted water until boiling, add the pasta and cook until al dente.  Add the bacon, and oregano to the cream mixture, cook for an additional 2 minutes. 

Drain the pasta, reserving some of the pasta water.  In a large bowl combine the pasta with the bacon mixture, roasted veggies, Mascarpone, parsley and half of the Parmesan.  Toss the pasta until all the ingredient are well combined, adding the pasta water to loosen the sauce.  Don't worry if the squash breaks up a bit, it will make the sauce creamy and wonderful!  Sprinkle the remaining Parmesan cheese on top and you're done!

Wednesday, November 10, 2010

Eggplant Loves Pesto

Stacks of Parmesan rinds
left over from pesto, ready for soup!
Once again the ladies at work and I found ourselves sitting around our lunch table talking about food, and for some reason the topic of pesto came up.  Now we were on a roll, taking about all sorts of pesto, and how we loved to use them, and what recipes were our favorites when my lovely British co-worker started to complain about how she can't find Aubergine pesto here in the states (at least here in the Pacific Northwest).  Now feeling like a very stupid American I had to ask her what in the hell is Aubergine pesto, thinking instantly of the color, and stupidly wondering what purple thing you could possibly make pesto out of.  So a little translation was required, and once again I was shown that there is a distinct difference between American and British English, and in conclusion, after much discussion, here in the states Aubergine is called eggplant and well in the UK (and originally France) I now know that eggplant is obviously called Aubergine (don't even get me started on zucchini versus courgettes or coriander versus cilantro.....these differences give me a culinary brain fart sometimes).  This situation also pointed out that I really needed to get out more......but that's a separate issue.  So a couple of weeks later we just so happened to drop by our little weekly farmers market and wouldn't you know it, destiny slapped me in the face, told me not to be such a linguistically challenged girl, and presented me with beautiful eggplants just begging to be turned into pesto.  Now I know that this post may be seasonally inappropriate since the time for local basil has long gone, but I am still finding very good basil at the market (even if it is not local), and since at least here, eggplants are available most of the year, I figured I could still share this recipe and be somewhat of a foodie....well, a little bit of a foodie anyway.  So I took my little purple beasts home and tried to conjure up a pesto recipe, in the hopes that it would come somewhat close to the variety my lovely British friend gets at home.  So I roasted and chopped and processed and took it to work the next day, fearing the worst........that it would not even be close.  Thankfully after seeing the expression on her face I think that it was a pretty good match, and judging from how quickly it disappeared I would say that it was delicious.  So at any rate I think I achieved my goal, and did a pretty good job of turning a linguistic embarrassment into another recipe that I can share and most importantly, hopefully, while rather small in measure, this little pesto gave my dear friend a taste of home.

Eggplant Pesto
1 large eggplant peeled and cubed
1 1/2 cup extra virgin olive oil
1 teaspoon salt (I prefer kosher)
1/2 teaspoon pepper
3 cloves garlic roughly chopped
1 1/2 cups basil leaves
6 sun dried tomato halves packed in oil
1/2 cup freshly grated Parmesan cheese
Additional salt to taste

Preheat oven to 425 degrees.   Place the cubed eggplant in a large bowl and toss with 3/4 cup of the olive oil and the salt and pepper.  If the eggplant seems a little dry you can add a little more oil but it does soak it up like a sponge and then releases a fair bit after it has roasted.  Place the eggplant on a cookie sheet and roast until the eggplant is tender, about 30-45 minutes.  Once the eggplant is tender, remove from the oven and allow it to cool completely.  While the eggplant is cooling place the basil and garlic in a food processor and process until finely chopped.  Add the sun dried tomatoes and chop again. 
Once the eggplant is cool add to the basil mixture along with the Parmesan.  Turn the processor on and while it is running drizzle the remaining olive oil in.  You can add more or less olive oil depending on the consistency you are looking for.  Salt the pesto to taste. 
So let it be known that I did leave out one of the key ingredients to pesto, pine nuts.  This happened purely by accident......and well, this pesto was soooo good without them that I decided not to include them, but you can add them if you feel disturbed making pesto without pine nuts.  I have spread this pesto over some good bread with a little Mascarpone, I have tossed it with warm spaghetti, and I have used it as a spread for sandwiches, it's just that good!  This unfortunately or fortunately means that I have a year's supply of this stuff in my freezer!

Friday, November 5, 2010

Pumpkin Pie's Alter Ego

This time of year means shorter days, crisper nights, yummy apples and pears, loads of squash and of course pumpkins.  The usual suspect that typically comes to mind when pumpkin is mentioned is of course pumpkin pie.  In fact I can't remember too many Thanksgiving dinners where some variation of pumpkin pie wasn't served.  Now of course there are many ways to cook and eat pumpkin, but pumpkin pie has to be the most famous here in the states, an iconic staple of our Thanksgiving holiday. 
So this past weekend I needed to come up with a dessert for my family's impending visit and I just so happened to be looking out at my back deck and noticed the pumpkins I had bought for something completely different that I was in no way going to have time to make.  I therefore wondered if maybe I could capitalize on my scheduling failure and come up with something centered around this lovely fruit.  I knew that I just didn't want to go the pie route, and I considered a pumpkin roll, but honestly how many times can you do one of those!  Then all of a sudden my mental block vanished and I was on a pumpkin dessert idea marathon and speaking of roll, I was on one a pumpkin dessert roll!  But anyway, disregarding that stupid joke, after some serious mad scribbling, and pumpkin dessert notes all over my living room (several ideas to be saved for a later pumpkin date) I decided to go with a mousse cake, paired with yummy homemade caramel, and even though I was a little apprehensive about how this would turn out, it was great, and a certain dear friend who serves as one of my many unfortunate product developers (a.k.a tasting victims) has been waiting very patiently for this recipe.  So Stacy, here ya go.....may the pumpkin force be with you.

Caramel Pumpkin Mousse Cake

Crust:
3 cups graham cracker crumbs
10 tablespoons unsalted butter melted
1/2 cup sugar
1 teaspoon cinnamon

Filling:
1 sugar pie pumpkin
1 1/2 cups water
3/4 cup half and half
3 eggs
1 teaspoon cinnamon
1/4 teaspoon salt
1/2 teaspoon pumpkin pie spice
1 teaspoon vanilla bean paste
1 teaspoon pure vanilla extract
3/4 cup packed light brown sugar
1 package gelatin
1/4 cup cold water
1 cup heavy cream
3 tablespoons sugar

Caramel:
1 1/2 cups sugar
1/3 cup water
1 cup heavy cream
8 tablespoons butter
1 tablespoon vanilla bean paste

Preheat oven to 350 degrees.  Slice pumpkin in half and scoop out all the seeds and pulp.  Place the pumpkin cut side down in a shallow casserole dish.  Add the 1 1/2 cups water and bake the pumpkin until the flesh is very tender, about 35 minutes.  Remove the pumpkin from the oven and set aside.  In a food processor combine the graham cracker crumbs, sugar and cinnamon.  With the processor running, slowly add the melted butter and process until the butter is evenly distributed and all the crumbs are moist.  Press the crumb mixture into a 9-inch springform pan and bake for 15 minutes.  Remove the crust from the oven and cool on a rack.  While the crust is cooling begin making the caramel.  I a large heavy saucepan add the sugar and the water.  Heat the sugar and water, gently swirling the saucepan to evenly cook the sugar.  Heat the sugar until the syrup begins to turn an amber color.  Don't let the sugar get too dark, or the caramel will taste bitter.  Once the sugar is an amber color add the heavy cream and vanilla and stir until completely incorporated.  Add the butter, one tablespoon at a time, stirring until each tablespoon is completely melted and the caramel has a smooth consistency.  When the caramel is done set aside while you prepare the filling.  To prepare the rest of the filling, scoop out the cooked pumpkin into a food processor and blend until smooth.  Add the half and half, sugar, vanilla, and spices.  Blend until combined and transfer into a large glass bowl or double boiler.  Place the bowl over a saucepan that has about 2 inches of boiling water in it and heat the pumpkin mixture until hot, stirring frequently.  In a separate bowl whisk the egg yolks.  Once the pumpkin mixture is hot add a small amount to the egg yolks, whisking constantly to temper the yolks before you add them to the pumpkin mixture.  Add the tempered egg yolks to the pumpkin mixture and stir until thickened, about 10 minutes.  In another small bowl dissolve the gelatin in the 1/4 cup cold water and add to the hot pumpkin mixture. 

Remove the pumpkin mixture from the heat and allow to cool.  Once the pumpkin mixture is cooled, beat the whip cream until soft peaks form, add the sugar, and beat until stiff peaks form.  Fold the whip cream into the pumpkin mixture.   Spread three quarters of the caramel over the bottom of the crust, then add the pumpkin mousse.  Chill the mousse cake until firm, at least 2 hours.  Once firm remove the cake from the springform and drizzle the remaining caramel over the top of the cake and serve.

Tuesday, November 2, 2010

Stew For Ghouls

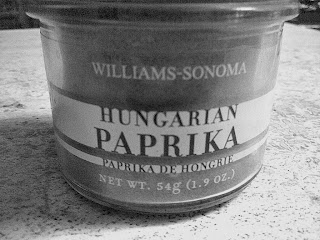
Halloween at my house has become a tradition for my family since my sister and I had kids.  So everyone comes over, there's lots of pictures, crying, laughing and just overall chaos and then the kids go trick or treating.  It also happens to be my birthday, but for some reason I always find myself cooking for a mass of people.  Nonetheless, for someone who loves food as much as I do, I couldn't imagine doing anything better for my birthday than cooking.  That doesn't mean however that at the end of the night I don't plop down on the couch, and think to myself, "why in the hell did I sign up for this?"  So for this Halloween I wanted to take it easy and cook something that could just sit on the stove and be ignored until people were ready to eat, and the first thing that came to mind was Goulash (the name is fitting isn't it).  Now if you haven't heard of Goulash here's my interpretation of what it is.........stew, with paprika.  Now around the world various cultures have their own versions of stew, and Goulash is the Hungarian version.  My research on Goulash recipes and what is authentic turned up the usual conclusion, as with all recipes iconic to any culture, Goulash is very different between regions and between each and every household in Hungary, but the overwhelming consensus seemed to be that the following ingredients had to be included: beef, tomatoes of some variety, caraway seeds, onions, carrots, and most important, paprika.  On the topic of paprika, it was stressed that the ONLY paprika considered acceptable for Goulash was Hungarian paprika (appropriate given the origin), and since I was honestly too tired of reading about Goulash and the differences between the varying types of paprika, I went with the experts and made certain that I only used the Hungarian variety in this dish.  One of the main dilemmas when looking at various recipes of Goulash is whether to include pasta, or dumplings, or neither, or maybe some potato, and on, and on, and on.................I think I am officially half comatose now.......I hate starch. 
Finally I had reached my breaking point, and just had to say "screw it" and build my own interpretation of this dish.  So I gathered all my ingredients and like a witch over her cauldron I concocted my Goulash potion.   Also, it would not be Halloween if there wasn't blood spilt, so let's say I "sacrificed" a chunk of the end of my left thumb for my potion.....and proceeded for fifteen minutes to try to locate this chunk in my pile of chopped sun dried tomatoes (I know....gross, but it is Halloween damn it!).  Luckily I found it, and started all over with a new pile of sun dried tomatoes, and a heavily bandaged thumb which kinda looked like a miniature version of the over sized bat I used in softball when I was a kid.  So in the end, the dinner was WAY more work (and blood) than I intended, but it was delicious and even though this Goulash is probably a weird, screwed up version of its true self I thought that it was fitting since, well, Halloween is just for that.......a chance for all of us to transform into a weird, screwed up version of our former selves.

Goulash
2 1/2lbs stew meat
2 strips of bacon minced
2 tablespoons olive oil
2 medium yellow onions diced
4 parsnips diced
3 carrots diced
4 medium red potatoes
2 tablespoons caraway seeds
2 tablespoons plus 2 teaspoons Hungarian paprika
1/4 teaspoon cayenne pepper
3 tablespoons brown sugar
1/2 cup balsamic vinegar
2 tablespoons Worcestershire sauce
6 oz tomato paste
5 sun dried tomatoes packed in oil diced
3 cups beef broth
4 cups water
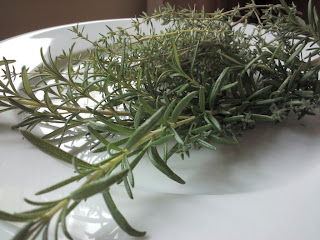
2 tablespoons fresh rosemary chopped
2 tablespoons fresh thyme chopped
3 tablespoons fresh Italian parsley chopped
3 teaspoons salt
2 teaspoon pepper

In a small skillet, roast the caraway seeds over medium heat just until they are aromatic, about 3-4 minutes.  Remove the seeds from the heat and grind them in a spice grinder (I have a retired coffee grinder that I have converted into a spice grinder). 
If you don't have a spice grinder just buy ground caraway and roast the ground spice in the skillet instead.  Set the ground caraway aside and preheat a dutch oven over medium high heat.  Add the minced bacon to the dutch oven and cook until crispy and until the fat is rendered, about 8 minutes.  While the bacon is cooking sprinkle the meat with half of the salt and half the pepper (you can add more......I know that I do, but I am a little of a salt freak) and about 2 teaspoons of the ground caraway seed.  Once the bacon is crispy remove it with a slotted spoon and set aside.  To the bacon fat add the meat in three additions, browning all pieces on all sides before adding the next batch. 
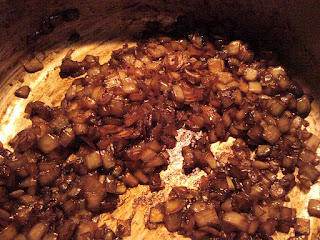
Between each batch set aside the browned meat.  Add the additional olive oil if needed to help with the browning of the meat.  You want to get a lot of caramelizing on the meat, it really flavors the sauce, so please......please don't crowd the meat!  Once all the meat is browned add the salt and the brown sugar.  Lower the heat to medium and allow the onions to cook fully and to caramelize, about 10 minutes.  You'll notice that when you first add the onions they will do a nice job deglazing the pan, this is a very, very good thing! 
Once the onion is caramelized add the balsamic vinegar and Worcestershire and scrape up all those yummy bits.  Add the sun dried tomatoes, all the paprika except for the last two teaspoons, the rest of the caraway, one tablespoon of the fresh rosemary and thyme.  Cook for about 2 minutes, but not too long, you don't want to overcook the paprika, it will taste bitter.  Add the tomato paste and cook another 2 minutes, then add the broth, water, all the veggies, reserved bacon and reserved beef.  Bring the stew to a simmer, cover and cook until the meat is fork tender, about an hour and a half. 
Once the meat is tender add the remaining paprika, cayenne, salt, pepper, and remaining fresh herbs.


 Cook an additional 10 minutes.  Serve the goulash with a dollop of sour cream (this is traditional) and with whatever yummy bread you prefer.