Wednesday, October 27, 2010

Harvest Day

Orchard dust still on them!
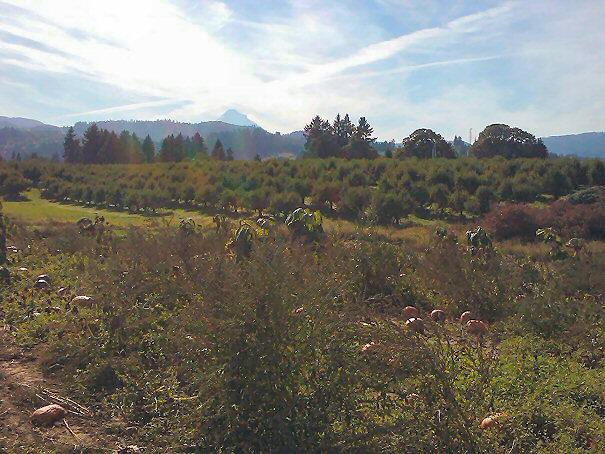
Every year since I was very little we would go to the same pumpkin patch and get all of our pumpkins for Halloween, our apples and pears for numerous treats yet to be made, and as much apple cider as we could stand, not to mention an incredible belly ache from all the caramel apples.  This particular pumpkin patch is located outside Portland Oregon in a little town called Hood River.  Now if you haven't heard of Hood River Oregon, it is a picturesque town snuggled right in between the Columbia River and Mount Hood, and well is known for producing some of the best fruit here in the states.  In particular, they are known for their pears, but the apples are fantastic too, in addition to wonderful peaches and cherries (I won't even go into the wine, it's amazing!).  The bulk of the fruit grown in this region is grown by a group of local farms congregated in a small area affectionately called the Fruit Loop by locals and for reasons I don't understand, provides all the necessary ingredients to grow everything from raspberries to walnuts.  This area is nessled between Hood River and Mount Hood, and continues to this day to be a ever increasing cornicopia of locally grown produce....a modern day garden of eden, and for these reasons among others I have to say this is one of the most beautiful places on earth, although I am biased since this is where I grew up.  But enough of this, on with the story......

Marina di Chioggia.........perfect for gnocchi!
So for the sake of tradition, when I had my daughter it was already pre determined that I would take her to this very same place (oh, if I didn't mention the name it is Rasmunssen Farms) to get her pumpkins, much to the chagrin of my husband, who thinks an hour drive to get pumpkins is kind of ridiculous, especially since there are several amazing farms much closer to us.  But for me this place is just one of those memory invoking places....a place to relive childhood.  We all have those, and that is something to be treasured and shared with the ones we love most in life.  So we set out, on a mission to find the perfect pumpkin, coffee in hand, driving through the Columbia Gorge on an October day that reminded me of why this is my favorite month of the year.  A fair bit later we reach the farm, and once again everyone else that day decided "lets get pumpkins today, because we all know who's gonna be there." 

Once we navigated through the sea of IDIOTS (sorry, an occasional emotional outburst may occur) we parked our car and headed for the pumpkin patch.  I have to say, luckily, that it didn't take us long to find our future Halloween carving candidates, but I seem to always forget the gloves, so our hands were full of little pumpkin thorns.  Oh, and if you plan on some pumpkin patch time of your own, don't leave your wagon unattended, some teenage punk WILL steal it and you will have to spend eternity trying to find another f&$#@!* one.......trust me.......I know.  
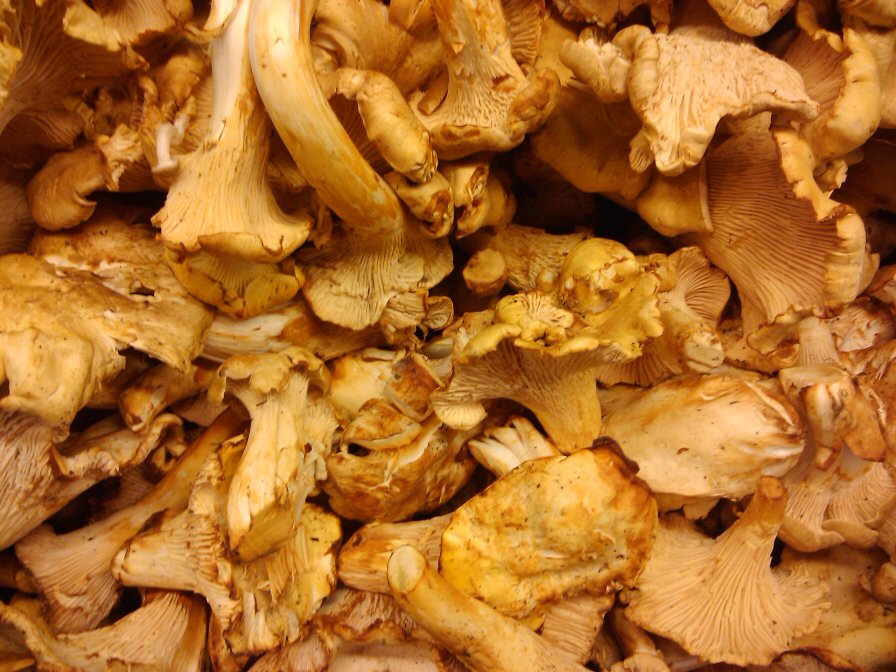
After we had picked out our pumpkins we headed off to collect all the apples and pears we could carry.  I entered the barn where the apples and pears were all displayed in large wooden orchard bins, when I noticed it, the line that stretched from here to China.  Feeling rather defeated I figured I would load up and hopefully by the time I had selected all my fruit the line would have shrunk.......ya, not so much.......I still haven't regained full feeling in my right arm....stupid apples..stupid people.   Now that I am done pouting, we packed up all of our treasures and headed off in search of apple cider.  We stopped at  Draper Girls Country Farm, a favorite of mine, which has amazing apple cider, fresh fruit all year, and locally raised lamb. 
Cider in hand, toddler asleep in the back, we had accomplished our mission, and driving away from this place I was reminded how wonderful this corner of the world is, and how lucky I am to be in it.
Beautiful!

Oh, I need to do a recipe for this post don't I!  So taking from the bounty of our harvest day this is what I came up with, and of course it was delicious!


Stuffed Pork Loin with Apple Cider Sauce

Stuffing:
4 cups day old cubed cornbread
1 tablespoon olive oil
1/4lb sausage
1 yellow onion diced
1 apple peeled and diced
1/4 cup butter
1/2 cup dried cranberries
1 tablespoon fresh rosemary chopped
(you can use Sage as well, I'm just not a big fan)
1/4 cup apple cider
1 teaspoon salt
1/2 teaspoon pepper

Pork:
4lb boneless pork loin roast butterflied
2 teaspoons salt
1 teaspoon pepper
1 tablespoon fresh rosemary chopped
8-10 Cippolini Onions peeled
2 fresh sprigs of rosemary
1/2 cup apple cider
Kitchen twine

Sauce:
2 cups apple cider
3 tablespoons butter
1 large shallot minced
1 apple peeled and diced
3 tablespoons grade A maple syrup
1 teaspoon salt
1/2 teaspoon pepper

Preheat oven to 350 degrees.  In a large skillet over medium heat, heat olive oil.  Add the sausage and cook until browned and crumbly, remove from the pan and set aside.  In the same pan melt the butter and then add the onions and apple and cook until the onion is translucent, about 5 minutes.  Add the cranberries, rosemary, and the reserved sausage and cook an additional 2-3 minutes.  In a large mixing bowl combine the onion mixture with the cornbread, tossing gently to prevent breaking up the cornbread too much.  Add the cider and the salt and pepper and toss again, set the stuffing aside while you prepare the pork.  To prepare the pork use half the salt and pepper and sprinkle in on one side of the pork.  Spoon the stuffing along the middle of the pork then roll up like a jelly roll.  Don't over stuff the pork, if you have some left over stuffing that's ok, just bake it up and use it as a side dish if people want a little extra stuffing.  Once the pork is rolled up tie the pork with the kitchen twine to ensure it doesn't fall apart while cooking.  Sprinkle the outside of the pork with the remaining salt and pepper and the fresh rosemary.  Place roast in a small roasting pan along with the onions and the fresh rosemary sprigs.  Add the cider and roast the pork for about 2 hours, basting it about every 1/2 hour.  Make sure the pork has reached an internal temperature of about 175 degrees.  When the pork is done remove it from the roasting pan, cover, and allow to rest while you prepare the sauce.  Remove the onions from the roasting pan and set those aside, and discard the rosemary sprigs.  For the sauce, using the roasting pan containing all the juices from the pork, melt the butter over medium heat.  Add the shallots and diced apple and cook until the shallots are translucent, again about 5 minutes.  Add the cider and maple syrup and cook until reduced and slightly thickened, about 8 minutes.  Remove the kitchen twine from pork loin and slice.  Place the sliced pork on a serving platter along with the reserved Cippolini onions.  Pour the apple cider sauce over the pork and serve.


Saturday, October 23, 2010

Cookie Code.............Cracked

Here in the Pacific Northwest coffee is a big deal.  I think it is all the rain.......I know it is all the rain.  Quite frankly the only way you can maintain some sanity when you are in the midst of a spring where it has been raining constantly for three months straight is to chug as much coffee as you can.  There are times when I think it is literally liquid sunshine.  So it is an added bonus when not only is the coffee really good, but also when there is a sweet accompaniment to dunk in your hot cup of happiness.  There is a local coffee company who's coffee I go out of my way to obtain, and I can with all certainty dedicate my marriage to this coffee, for without Stumptown, I may not have my dear husband.  So as luck would have it (my bank account may not agree), a coffee shop carrying Stumptown coffee opened up within walking distance from my office.  So who would have guessed that the other day I happened to be at this very establishment with my lovely British co-worker (who also shares my deep affection for coffee), when we spotted them, these lovely dunking jewels that were just begging to become intimate friends with our Americanos.
So with tongues wagging we purchased these biscuits (or cookies as we like to call them here in the states) and tested them with our delicious coffee.  Needless to say, we were instantly hooked.   They were a delicious buttery, crispy shortbread dotted with yummy hazelnuts, with half the cookie dunked in good dark chocolate.  Now that we had found our new afternoon obsession, we made the trek to that coffee shop practically everyday for the next week, hoping to gobble up another delicious cookie, but to no avail the cookies eluded us.  By the end of the week I was in a panic, I had to have the damn things...........so I decided I would crack this cookie code and make them myself.
So I went home that night, and madly tried to recreate this mystery cookie, thinking back to the flavors, the texture, and at about nine o'clock that night I had it, my Frankenstein was complete, and well, in my opinion, it was spot on.  I think Mary Shelley would be proud.

Hazelnut Espresso Shortbread Cookies

2 cups unbleached all purpose flour
1 1/2 cups butter at room temperature
1/2 cup chopped hazelnuts
3/4 cup sugar
1 1/2 teaspoons vanilla
1 tablespoon espresso powder
1 tablespoon hot water
16 oz dark chocolate melted


Preheat oven to 350 degrees.  In a small bowl combine the espresso powder and hot water
and stir until the espresso powder is dissolved.  In a mixer with a paddle attachment mix the butter and sugar until smooth and well combined.  Add the vanilla and espresso and mix again until well combined.  Add the flour and mix until just combined, then add the hazelnuts and quickly mix.

Turn the dough out onto a floured surface and knead the dough a few times until it starts to crack a little.  Roll the dough out until it is about a 1/2 of an inch thick.  Cut the dough into rounds using a 3 inch round cookie cutter and place on a cookie sheet lined with parchment paper.  Bake cookies for 15-18 minutes,  or until cookies look slightly browned around the edges.  Remove cookies from oven and let them sit on cookie sheet for an additional 5 minutes.  Place cookies on rack and cool completely.  Repeat with remaining dough.  Melt chocolate in a double boiler and dip each cookie half way up in the chocolate.  Place on rack and leave until chocolate sets (unless you just can't control yourself).  Makes about 2 dozen.

I think these cookies are delicious without the chocolate too, so you could leave some of them naked!

Wednesday, October 20, 2010

A Tale Of Two Savory Tarts

I am a big fan of tarts (the human variety aren't bad either), so I am always trying to find something that will go in a tart shell.  Now I have to admit that I usually go for the sweet varieties in the tart family but this time I wanted to explore some of the savory family members.  The other day I had found myself obsessed with making a apple Tarte Tatin, but I remembered that I had a huge bag of Cippolini onions that I had just bought that needed a purpose to their lives so I thought I would switch gears and go with an onion Tarte Tatin.  Coming from a family of avid pie connoisseurs the mechanics of a Tart Tatin just doesn't make sense, and pair that with the obsessive compulsive in me and I just want to scream "it's f%&*!#% upside down damn it!"  But like many things in life, the things that make the least sense are sometimes the best, and a good Tarte Tatin is just that.........the best.  So I decided to embark on my onion Tarte Tatin adventure, challenging the OCD in me and the sudden urge to just chuck it all and stick with apples, which I know are delicious and a sure thing (tart, sure thing............should go hand in hand right?).

Note: The crusts for both of the tarts listed here are adapted from Linda Dannenberg's recipe for Pate Sablee, featured in her cookbook French Tarts: 50 Savory and Sweet Recipes

Onion Tarte Tatin

Pate Sablee (adapted from Linda Dannenberg):
8 tablespoons cold butter diced
1 1/2 cup flour
1/2 cup Comte finely shredded
1 tablespoon chopped fresh thyme
1 egg beaten
4 tablespoons ice water
Filling :
2 lbs Cippolini onions peeled and sliced in half
4 tablespoons butter
2 cups Balsamic vinegar
1 tablespoon chopped fresh thyme
1 teaspoon salt
1/2 teaspoon pepper

To prepare crust, in a mixer with a paddle attachment, mix the butter and flour together until it has a fine crumbly texture.  Add the cheese and thyme and process a little more until combined.  Drizzle the egg and water over the flour mixture and mix until the dough just comes together into a solid mass.  Shape the dough into a disk and wrap in plastic wrap.  Let the dough rest in the refrigerator while you assemble the filling.
Preheat the broiler and melt the butter for the filling in a large saucepan over medium heat (if you're a lucky soul and have a Tarte Tatin pan, use that......I am unfortunately not one of those people).  Add the onions, being careful not to break them apart.  Cook the onions until they are nice and caramelized on one side then add 1 cup of the Balsamic and cook until slightly reduced, about 2 minutes.  Once the vinegar is reduced sprinkle the chopped thyme over the onions and place the onions under the broiler and broil them until they are caramelized on top, about 2-3 minutes. 

Remove the pan from the broiler and then add the last cup of Balsamic vinegar and cook for an additional minute.  Remove the pan from the heat and carefully arrange the onions in a 9 inch cake pan or pie plate, pouring all the Balsamic syrup over the onions.  Preheat the oven to 375 degrees.
Remove the plastic wrap from the chilled dough and roll out until the dough is about and 1/8th of an inch thick (there will be extra dough left over, I just freeze it and save it for other delicious things!).  Trim the dough down to about 10 inches in diameter and place over the onions.  You can crimp the edges to make it very pretty, but you're going to invert the damn thing and ruin it so you really don't have to put in that much effort.  Place tart in the oven and bake until the crust is golden, about 35 minutes.  Once the tart is done simply remove it from the oven, place your serving plate over the tart and invert!  This tart is definitely an example of how going against logic can end in the best result, and for me, as a biochemist, going against logic is a very hard thing to do.

Now onto the second savory tart, which was inspired by a longing for summer to never die, and wishing for a land where tomatoes are delicious all year (oh, wait, that would be Italy).  So even though we are at the very end of our tomato season here (if not just past it) I was able to find the last of a few local heirloom tomatoes at the market and decided to tart them up, and since I have been on a blue cheese kick lately I thought I would include some variety of it in this recipe as well.  So I decided to go for Cambozola, which I know is a bastard cheese, some mutant cross between a Camembert and a Gorgonzola.  That being said, it is still delicious, with a creamy texture of a Camembert but with the sharpness in flavor of a Gorgonzola, but a bit milder. If you have an aversion to blue cheese, Brie would be a yummy substitution for this tart or even one of Cambozola's parents, Camembert.  To be honest one of these cheeses may be used for this tart in the future.

Tomato and Cambozola Tart

Pate Sablee (Adapted from Linda Dannenberg):
8 tablespoons cold butter diced
1 1/2 cup flour
1/2 cup Parmesan finely shredded
2 teaspoons ground pepper
1 egg beaten
4 tablespoons ice water

Filling:
5 tablespoons extra virgin olive oil
1 clove garlic
2 lbs large heirloom or Beefsteak tomatoes sliced
1/2 cup Parmesan
1/4 lb Cambozola or Brie sliced
1 tablespoon fresh oregano chopped
2 teaspoons salt
1 teaspoon pepper

Preheat oven to 425 degrees.  Cut the top off the garlic bulb and place on a sheet of foil.  Drizzle with 3 tablespoons of the olive oil and wrap the garlic in the foil.  Bake for about 45 minutes until the garlic is very soft and tan in color.  Meanwhile prepare the crust following the same procedure for the onion Tarte Tatin.  Chill dough for about 30 minutes then roll out until the pastry is about 1/8th of an inch thick. 

Trim pastry down to a 12 inch diameter circle and press into a 9 inch tart pan, trimming any excess pastry from the edge.  Remove the garlic cloves from the bulb and spread the roasted garlic over the tart shell.  Layer the sliced cheese over the garlic, followed by the tomatoes.  Sprinkle the tomatoes with the salt and pepper, followed by the Parmesan and the oregano. 

Drizzle the remaining olive oil over the tomatoes and bake the tart at 400 degrees for about 45 minutes or until the tart is golden in color.  This tart is really best served at room temperature, so let it rest if you can........which I was not able to.  I have never been big on the whole patience thing, even though my mother says it's a virtue.


Whew! There you go, a tart marathon (there should be more of those in life).  So hopefully this inspires you to venture into tart insanity, and especially pay a visit to the savory tart family, I promise you won't be disappointed.

Saturday, October 16, 2010

A Little Luxury And Blue Collar On A Friday Night

Every once in awhile we all nee a little spoiling right?  So why not on a Friday night?  I mean, we're already celebrating because......well...... it's Friday.  In my previous post I just so happened to say that another fungi friend would be visiting a blog near you, and what better day for a visit than Friday.  When those lovely Portabella mushrooms found their way into my grocery cart so did one of their cousins, the Chanterelle.  You might ask, what is so luxurious about a Chanterelle?  Well, they're expensive, very expensive in fact (well at least they are here), so I would say that qualifies them as a luxury.  So going with that theme I had to use these beauties in a way that would do them justice, and since I am a big pasta fan, I wanted to facilitate a luxurious ( I know I am overdoing this word.......but screw it, its a great word) marriage between these two. 
Trying to come up with a recipe for this was a little difficult, because I didn't want just pasta and mushrooms.  It needed to be more..........and quite frankly I was feeling a little naughty, and since I am already the size of a Macy's day float I figured I would go for the gusto.  These mushrooms had to be paired with of course lots of butter and cream.........but what else to add?  And then it dawned on me, I had bought some Langostino tails the other day and they just so happened to be sitting in my freezer, unused (how that happened I don't know).  Now if you haven't had Langostino tails before they are kinda of a marriage between a prawn and a lobster, firmer in texture like a prawn, but sweet in flavor like lobster.  I like to refer to them as blue collar lobster (I say this with great affection).  So there it was, Chanterelles with butter, cream, and Langostino tails over pasta.........a pairing of luxury and blue collar....a marriage made in heaven.

Linguine With Chanterelles and Langostino


1 lb Chanterelle mushrooms sliced
1 lb Langostino Tails
3 cloves garlic minced
3 tablespoons butter
2 tablespoons extra virgin olive oil
1 lemon zested and juiced
1 cup white wine (I like Pinot Grigio)
1/12 cups heavy cream
1/4 cup chopped Italian parsley
1/4 cup freshly grated Parmesan
2 teaspoons salt (I use Kosher salt)
1 teaspoon pepper
1 lb Linguine

In a large stockpot heat water until boiling.  While the water is coming to a boil heat butter and olive oil in a large saucepan on medium heat until the butter is melted.  Add garlic and cook until the garlic is tender, about 3-4 minutes.  Add the mushrooms and sprinkle with 1 teaspoon salt.  Saute the mushrooms until they are tender, about 5 minutes.  Add the lemon zest and wine and reduce slightly, about 2 minutes. 

Add the Langostino tails and cook until heated through, about 5 minutes.  Add the cream and remaining salt and pepper.  Reduce the sauce until it is slightly thickened, about 5-7 minutes, and then add the parsley.  Remove the sauce from the heat and set aside. 


Salt the water in the stockpot and cook the pasta until it is al dente, about 8 minutes.  Once the pasta is done, drain and reserve about a cup of the pasta water.  Toss the pasta with the sauce and add about 2 tablespoons of the lemon juice.  Toss in the Parmesan cheese, adding the reserved pasta water to loosen the sauce if needed.
After having this I can say with the utmost certainty that I am a fungi lover, and must have more.  Maybe I could go all wilderness girl and forage for my own Chanterelles...........wouldn't that be an embarrassingly amusing blog entry.

Wednesday, October 13, 2010

Magic Mushrooms

Waking up the last few mornings and feeling the chill in the air I am reminded once again that fall is in full swing here and that the summer days are gone.  Now as depressing as this might seem, here in the Pacific Northwest fall brings a bounty of fruits and vegetables that I wait all year to have, which includes an impressive variety of mushrooms both locally grown and locally foraged.  I have found a new love for mushrooms, which has not always been the case.  When I was pregnant with my daughter the sight or smell of any mushroom sent me running for the hills (gagging as I went) and after having her it took me a long time to formulate a friendly relationship with fungi of the edible variety.  But here I am, a changed woman, and surprisingly writing about a recipe that not only involves mushrooms but is also vegetarian (what warped universe am I in).  The idea for a mushroom recipe came to me while I was at the market the other day, trying desperately to find inspiration for my next post.  Then suddenly I found my muse, large and lovely, just waiting to be bought and cooked............drum roll please..............Portabella mushrooms.  As destiny would have it these lovely jewels were surrounded by other pleasing candidates, wild Chanterelles, Brown Beech, and lobster mushrooms.  One of these varieties might be coming to a blog near you.....just so ya know.
So I brought these beauties home and damned if I knew what to do with them.  They were so lovely so I didn't want to chop them up and put them into something.  No, I wanted them to be the centerpiece.  But I have to say that I wanted whatever I made to be fast, since my three year old was growing more and more impatient by the minute waiting for mummy to finish in the kitchen.  So once again I perused my fridge, trying to put something together, and by the time I had figured it all out my little one was at the end of the line in the patience department.   So to turn that frown of hers upside down I put a little apron on her and she helped me make this dish from beginning to end, and wouldn't you know it, it was absolutely delicious.  However, I have to say that even though the meal was wonderful, the company was so much better, so Ava bug this one is for you.

Ava's Stuffed Portabella Mushrooms

3 tablespoon butter
4 tablespoons extra virgin olive oil
2 shallots diced
2 garlic cloves minced
16 oz frozen chopped spinach, thawed
2 tablespoons Dijon mustard
2 teaspoons fresh Thyme chopped
2 teaspoons fresh Oregano chopped
1 tablespoon fresh Italian parsley chopped
2 teaspoons salt
1 teaspoon pepper
1 egg
1 cup freshly grated Parmesan cheese
1 1/4 cup fresh breadcrumbs (see note)
3/4 cup crumbled feta cheese
4 large Portabello mushrooms, stems removed and gills scraped out

Preheat oven to 375 degrees.  Place mushrooms in a large glass baking dish.  Brush the inside of the mushrooms with 2 tablespoons of the olive oil.  Salt and pepper the inside of the mushrooms with 1 teaspoon of the salt and 1/2 teaspoon of the pepper.  Set aside.  To prepare the filling for the mushrooms melt 1 tablespoon of the butter and remaining olive oil in a saucepan over medium heat.  Add the shallots and garlic and saute until translucent, about 5 minutes.  Squeeze any excess water out of the thawed spinach and add spinach to the pan, cook until the spinach is heated through, about 3 minutes.  Add the herbs and mustard, stir to combine and cook for an additional 2 minutes.  Remove the spinach mixture from the heat and transfer to a mixing bowl.  Cool just until the mixture will not be hot enough to cook the egg.  Once the mixture is cooled add the egg, 2/3 cup of the Parmesan cheese, 3/4 cup of the fresh breadcrumbs, and the feta cheese.  Stir to combine then season with the remaining salt and pepper and set aside.  In a separate bowl combine the remaining Parmesan cheese and breadcrumbs.  Melt the remaining butter and add to the breadcrumb/Parmesan mixture.  Stuff each mushroom with an equal amount of the spinach mixture then sprinkle the breadcrumb topping over each mushroom.  Put in the oven and bake uncovered until the topping is browned and the mushrooms look cooked, about 35 minutes.

Hummmm.......crab would be yummy here.........so would sausage, but that's not very vegetarian is it.

Note: To make fresh breadcrumbs simply put a piece of day old bread in a food processor until crumbed.  If you don't have a food processor you can substitute the bread crumbs with Panko.

Saturday, October 9, 2010

Breakfast.....It's What's For Dinner

My dear husband is a big fan of breakfast, so once in awhile I treat him to breakfast for dinner.  The other night I was having a fierce craving for Mexican food, and the thought came to me, why not merge my husband's love for breakfast and meanwhile satisfy my lust for Mexican food.   So the option that initially came to mind was.......breakfast burritos.
Now I have been making breakfast burritos for my husband for years with those rubbery pre packaged tortillas and with no hint of Mexican about them.  So the foodie challenge to me was very clear, learn how to Mexicanize (I know........Mexicanize is not a word, but if you can't be grammatically challenged on your own blog where can you be?) my un-Mexican breakfast burritos.  Let me be clear, there is no part of me that is an authority on authentic Mexican food, in fact I do not even know if they eat breakfast burritos in Mexico (they would be crazy not too by the way, so I am sure that they do), but my appetite drove me to make this possibly un-Mexican, Mexican food.
The first goal of this dish was to make my own tortillas, which I have done before, but needless to say, they were a disaster and I gave up on them.  I distinctly remember them being stone hard, flavorless, and a royal pain in the a#$ to make, but I was feeling a new sense of purpose, and homemade tortillas were once again front and center.  Again, since I am in no way an authority in Mexican cooking, I went right to the source for a good tortilla recipe.  My co-worker, who happens to be Mexican. 
So I tell her all about my past tortilla sins and like a brilliant tortilla Buddha she shows me the path to tortilla sublimity, and simply refers me to a YouTube video done by Robert Rodriguez, who happens to be a famous director (Machete, Sin City) and oh by the way, has a video on how to make breakfast burritos made with homemade tortillas! (he actually has several cooking videos).  So I watched, learned and made homemade tortillas and OMG, I will never buy tortillas again.  Not only were they delicious but this recipe is very easy to do, so it gets a double gold star for that!  I made one small change though to the recipe.  Robert calls for a combination of lard and butter in the tortillas and I just could not find that stupid stuff (lard) so I gave up and substituted it with vegetable shortening and it worked great.  I also tried them with just butter and not so good (the only time in history when butter alone doesn't work!), you really need the shortening to get a tender texture, so don't skip it.  I will try lard someday as I will now be on a lard hunting expedition. 


As for the filling for my burritos I didn't follow Robert exactly.   My filling consisted of fried Yukon Gold potatoes, Mexican Chorizo with some sauteed onion, of course eggs, and I topped the burritos with a little Queso Fresco and cilantro.  I also took the opportunity to make some homemade salsa for my burritos, and since I had previously found some gorgeous tomatillos at the farmers market , which were submissively lying in the crisper in my fridge, I decided to make Salsa Verde. 

I am going to digress here at bit, but this serves as a warning.  While buying the remaining ingredients for my salsa I also found some amazing locally grown purple jalapenos, which looked like something out of a Dr. Seuss book, so of course I had to add those, and I have to say I got a little over zealous when it came to the sheer number of peppers I purchased and therefore the sheer number of peppers I put in the salsa...........I don't know if my mouth or digestive tract will ever recover.  That was probably too much info, so forgive me, but ya...........it was too much, so don't overdo it on the peppers, unless you have a very large supply of Tums on you or you have a stomach made of steel.  Either way, this meal was delicious, easy to make, and what could be better than breakfast for breakfast?  Breakfast for dinner.................with Mexican flair.


Salsa Verde

2 lbs tomatillos husks removed
1 onion roughly chopped
1 clove of garlic
2 limes juiced
1-2 teaspoons salt
1-2 jalapenos roughly chopped
1/2 cup cilantro leaves

Preheat broiler.  Place tomatillos on a cookie sheet and broil until skins are charred, about 10 minutes.  Remove tomatillos from oven and cool.  Once the tomatillos are cooled place them into a blender and puree.  Add remaining ingredients and puree, until all the ingredients are finely chopped and the salsa is well blended.

Tuesday, October 5, 2010

Turkey Trauma

My mother, who I love dearly, is Canadian and had a birthday this past week.  The reason I mention that she is Canadian is because this fact definately contributed to the turkey hell I was about to embark on...... but I digress.  Anyway, in my family for everyone's birthday we have a birthday dinner, and the birthday girl or boy gets to pick whatever they want to eat. Now most of the time my mother cooks said birthday dinner, but when mom's birthday rolls around of course it is up to myself or my sister to cook.  So, silly me, I volunteered this year to cook my mum's b-day dinner and surprise, she picks damn turkey.  Now initially I tried to convince her to pick something else but she was insistent, and since Canada's Thanksgiving is coming up, and I think she was feeling a little homesick, I obliged her.
The turkey trauma therefore came from the sheer difficulty of finding a whole turkey (not just the breast) outside the realm of the U.S. Thanksgiving holiday.  I mean come on, is there a turkey strike for the whole year and then miraculously in November all turkey's say "OK, bring it on!" (if I were a turkey I would probably do the same).  I started my turkey mission with the idea I would find a nice, free range, organic bird so I hit a nice upper end market (I will leave them nameless) in search of bird Nirvana.  Needless to say the only turkey's they had were their dwarf cousins that were at the most horrific price I had ever seen on a turkey that honestly has spent the last few months frozen solid.  So after much deliberation I headed out the door.......well after purchasing some good feta, organic greens, local plums, local beer (I would need this desperately later in the evening)......as so on and so on.  Now I was on to the next market, which was slightly less pricey but good still, and to no avail, no turkeys.  Then to a third market (downgrading as I go) which had turkey's, but specimens that were simply wrapped in white plastic with just "Young Turkey" marked on it.......ya, not so much.  Finally, in desperation I hit the last market.  Now this market wasn't the bottom of the barrel (a girl's gotta have her standards) but it may have been flirting with it.  Wouldn't ya know it, they have turkey's, but the turkey's they have are a name brand that I do not buy, more for ethical reasons than anything (again, leaving them nameless) else, but I am desperate, it's the last market that I am willing to buy a turkey from and well if my mother does not have her damn turkey, I will hear about it.  So I give in, but I of course need a particular size, not too big, not too small, but this is my luck in life.......we got turkey's but you only have two sizes, small or gargantuous (how do they get birds that big!..........I don't want to know).  After digging and digging in stinky frozen turkey mess for what I swear was a half an hour (I gaged this based on the fact that I may have been developing frost bite on all of my ten digits) I find what appears to be a good size, although there is no weight on the bird.  I disregard this, a mistake I will regret later, and plop the frozen mass in my cart and go up to check out with the stink of frozen meat all over my hands.
So there I am, standing at the checkout counter, defrosting my stinky hands, counting the minutes till I can get home and guzzle my delicious frothy drink waiting for me, when I hear the grocery clerk tell me the bird has no bar code, so they will need to check with the meat department for a price.  So they take my perfectly sized bird away, and I now realize that a large line is behind me, giving me glares that equate to "why the f#$%& did you get a bird without a bar code you stupid woman!"  The clerk comes back with a different bird, a much smaller cousin to my chosen victim and tells me I can't buy the stupid thing because they don't know how big it is, but here's my puny replacement.  Now I ask myself, how difficult is it to weigh a bird? Especially in the meat department, where it would kinda make sense that they would have a few scales on them.  So I tell the clerk, "this is too small" and she promptly runs back to find another.  There is now a frenzy of calls between this clerk and a second clerk at the checkout stand about sizes and what would work and me repeatedly asking where the french my original bird went, until quite frankly I give up and they bring me a small bird.  I leave the market feeling defeated and turkey traumatized, I think was even crying to myself, mumbling how much I HATE turkey (I was so out of it that I practically tripped over a little boy selling some popcorn for the Boy Scouts) and promptly headed home to drown my tears in a delicious beer.
So anyway, even though this post is turning into a bitter diatribe I thought that something good should come from it, so I thought I would post a few of my turkey recommendations so when Thanksgiving in the states rolls around you'll have some options in your turkey arsenal.  So here they are:

1. It is my experience to never stuff a turkey.  The bread takes all the moisture out of the bird.  Cook your stuffing separately, adding good chicken or turkey stock to moisten it.  I stuff my turkey with some flavor enhancing stuff like onion, celery and some fresh sage.  If you like to present a whole bird stuffed to your family, simply spoon the stuffing into the cavity right before serving. 

2. Rub the bird down with olive oil and not butter.  I know, I know, I love butter too, but olive oil has very little water content, so it helps to lock in the moisture in the turkey (this is the scientist in me, probably is a load of crap, but it sounds logical), but it still enables nice browning of the skin.  I have also tried initially rubbing the bird down with olive oil but at the end of the cooking time basted the bird with melted butter.  Also, in addition to rubbing the skin down, rub the cavity with down with olive oil and sprinkle the bird inside and out with salt and pepper.

3. Cook your bird breast side down.  This is a trick that my Italian grandmother taught me, and well it sounds ridiculous but it works, trust me.

4. Cook your bird on low heat for a long period of time (again, another trick my grandmother taught me), then flip the bird, cook on a higher heat to brown the breast.  I start cooking the bird at 275 degrees for several hours, then flip and cook at 400 degrees just until the breast starts to brown.  Cooking times will vary depending on the bird.  For a big bird you might have an early morning, but who in your family wouldn't love waking up to the smell of turkey roasting.........yum.

5. Good gravy is essential.  I have found the best recipe from  for a gravy base that Tom Colicchio did for Bon Appetite and quite frankly it makes gravy irresistible, you can find it here http://www.epicurious.com/recipes/food/views/Tom-Colicchios-Herb-Butter-Turkey-233118.  The recipe calls for two pounds of turkey necks/wings but I just used the turkey neck that came with the turkey and it was fine.

6. Do yourself a favor, don't use canned cranberry sauce, cranberry sauce from made from fresh cranberries is delicious and very easy to make, and if you have any left over it goes great over ice cream.  Here's a quick recipe that I use:

Orange Scented Cranberry Sauce

1 lb fresh or frozen cranberries
1 orange zested and juiced
1 cup sugar
3 cups diced plums, pears, or apples (I like to use plums but the others work well too)
1 1/2 teaspoons cinnamon
1/2 teaspoons cardamom
1/8 teaspoon ginger (powdered)
1/2 teaspoon vanilla

It's simple, add all ingredients to a medium saucepan and over medium heat cook until the fruit is broken down and the mixture is starting to thicken, about 20-30 minutes.  Let cool and it's ready!  You can do this the night before and it will be perfect the next day.

So the take home message from this post is simple; one, hopefully I have added some more tool to use for your own turkey adventures, and two, don't buy a turkey in any month other than November, and if you want to roast a turkey at any other time of the year (outside the month of November here in the states) stock up in November, because the damn turkey's are on strike the rest of the year.

Saturday, October 2, 2010

Mac-n-Cheese.................For K

One of my co-workers is from London and has expressed to me repeatedly how much she loves mac-n-cheese, I mean loves mac-n-cheese.  Now you may have already guessed that I love food, and therefore also love to talk about food, hence the whole blog thing.  So it wouldn't stretch the imagination that when me and my lovely British co-worker talk, number one, we often talk about food, and two, mac-n-cheese comes up often.  When I mentioned to her that I was doing this whole blog thing she naturally and unsurprisingly asked me to do mac-n-cheese, and well.........I did.  So, this ones for you K.................

Baked Mac-n-Cheese

1lb Fusilli, Cavatappi, or elbow pasta
6 cups whole milk
1/2 cup butter
1/2 cup flour
1/2 lb bacon diced
2 cups Comte shredded
3 cups extra sharp white cheddar shredded
2 cups Fontina shredded
1/2 cup Mascarpone cheese
1/2 teaspoons pepper
1 teaspoon salt
1 cup fresh breadcrumbs
1/2 cup Parmesan
2 tablespoons butter melted

Heat oven to 400 degrees.  I a small skillet over medium high heat cook bacon until crispy, remove with a slotted spoon and reserve.  Meanwhile, heat a large pot of  water over high heat.  Once the water is at a full salt the water and add pasta, cook until al dente, about 8 minutes.  In a medium saucepan heat milk until just starting to steam.  In another saucepan melt butter over medium heat.  Whisk the flour into the butter (this is called a roux), cook roux for about 1 minute.  Add the heated milk to the roux, whisking constantly.  Heat the milk until thickened and steaming, but not boiling.  Remove from heat and let stand for about 5 minutes.  After the milk has slightly cooled, add all the shredded cheeses, and Mascarpone, whisking the cheese sauce until the cheeses are completely melted and the sauce has a smooth consistency.  Drain pasta and add to the cheese sauce (the mixture will look very soupy, don't worry, it will thicken up in the oven).  Add the bacon to the pasta and toss.  In a small bowl combine the breadcrumbs and Parmesan.  Drizzle melted butter over breadcrumb/cheese mixture and stir until butter is completely incorporated.  Pour the pasta/cheese sauce/bacon mixture into a 9x13 inch glass baking dish and sprinkle breadcrumbs on top.  Bake mac-n-cheese until the breadcrumbs are browned and the sauce is bubbling, about twenty minutes.
Now hopefully this mac-n-cheese meets all of K's expectations, and yours as well.